If you’ve looked around my site only briefly, you probably caught on that I love making wooden kitchen utensils — cutting boards, trays, spoons, honey dippers, spatulas, etc. In this article, I’m going to talk about how to care for wooden utensils so they will last for generations. I’ll even be sharing a beeswax butter recipe (at the end) that’s easy to make and use.
If you’d like to make your own cutting board, I’d urge you to check out my tutorial on making your first wooden cutting board. I’ll take you step-by-step through the process. If you don’t have a lot of tools, I also have a tutorial that shows you how to make a cutting board, using a kit.
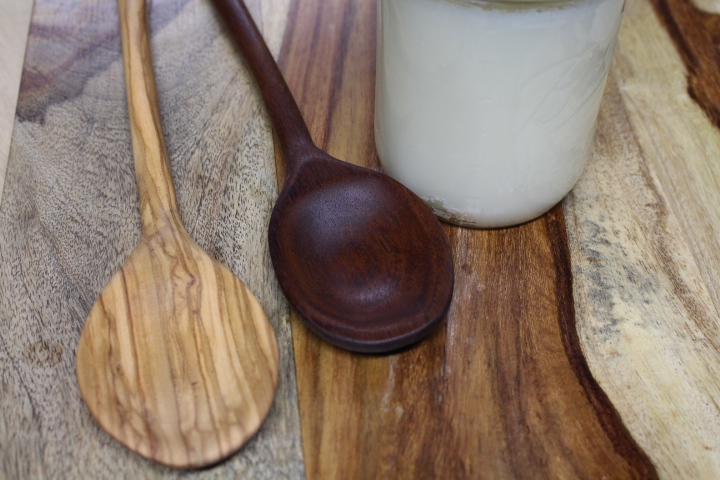
I like to use hardwoods for my kitchen utensils because they’re durable and they last for decades. I will probably pass some of these utensils down to my kids or grandchildren. But, like anything, you do have to take care of these beautiful instruments for them to last.
What are the best woods for cutting boards and other utensils?
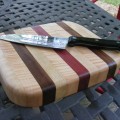
Hardwoods that are closed-grain are the best candidate for wood cutting boards. I like to use cherry, maple, walnut, purple heat, yellow heart. It’s very common to laminate all of these boards together and add color and an artistic flair to your boards. These woods also make great materials for spoons.
If you follow some of my tutorials and make your own wooden utensils, I recommend doing two things before the wood even touches food:
First, gently rub your fingers all around the surface to make sure you did a thorough sanding job. Nobody likes to get splinters in their finger or in their food.
Next, apply a food-safe finish like store-bought mineral oil or you can use the beeswax butter (see recipe below). Let that soak in over night, and apply another coat.
How to clean and maintain cutting boards and other wooden utensils
- After each use, wash the utensils off in some warm, soapy water. I like to use a gentle scrub brush, too. Sometimes it may only be necessary to rinse with water.
- Rinse off the utensil and wipe off excess water with a hand towel.
- Prop it up on something and let it air dry. (I prefer NOT to just lay on a towel. Get it up in the air where it can properly dry)
- If the cutting board or utensil starts looking really dry or a dull color, then reapply food-safe mineral oil or the beeswax butter. If you use the utensil frequently, then you might want to apply the butter every two weeks or at least once a month. Based on my research, I also discovered that there are some oils — like vegetable oil or olive oil — you may want to avoid. Supposedly, these oils become rancid and sticky.
- Some folks may want to take extra steps and use bleach or some kind of sanitizer, but I don’t think this is necessary. All I use is soapy water. Too many other chemicals or too much soap will deplete the mineral oil. The mineral oil (or the butter) helps propel moisture and other contaminents out of the wood and hopefully prevents cracking over time. Using bleach or even diluted bleach can also change the color of your wood.
- Please DO NOT allow your wooden utensils to soak in water and DON’T put them in your dishwasher.
Other Long-Term Maintenance
Besides the on-going cleaning, you may have to do some additional maintenance or know when to say goodbye to your kitchen utensil.
- Sometimes your wooden utensils may develop cracks. If the crack is small and not that deep, then you can probably sand and buff it out. If you can’t easily repair this and it’s a sizable crack, I’d recommend retiring the utensil. Cracks can be harder to clean and you may snag a splinter.
- After months or years of use, you might want to consider sanding your wooden utensil. Make sure it’s clean and dry. Take some 120 grit sandpaper and sand out all the scuff- marks, then finish with 220 and 320 grits (an orbital sander works great for cutting boards). Take a damp rag and wipe the utensil thoroughly and allow it to dry. This will raise the grain, so you can hit it again with 220 and 320 grit sandpaper. Wipe off any dust with a clean cloth. Then apply the mineral oil and/or the beeswax butter.
Wooden Cutting Boards vs. Plastic Cutting Boards
The question often comes up: which cutting board is safer — wood or plastic? Check out this article that cites some studies performed by UC Davis. The results are very interesting. Even plastic boards need to be properly cleaned and maintain to keep then safe. In my opinion, plastic boards need to be changed out more frequently than wooden cutting boards. Plastic gets cut up and roughed up just like wood. At least with wood, you could re-sand your board and get additional use.
Beeswax Wood Butter Recipe
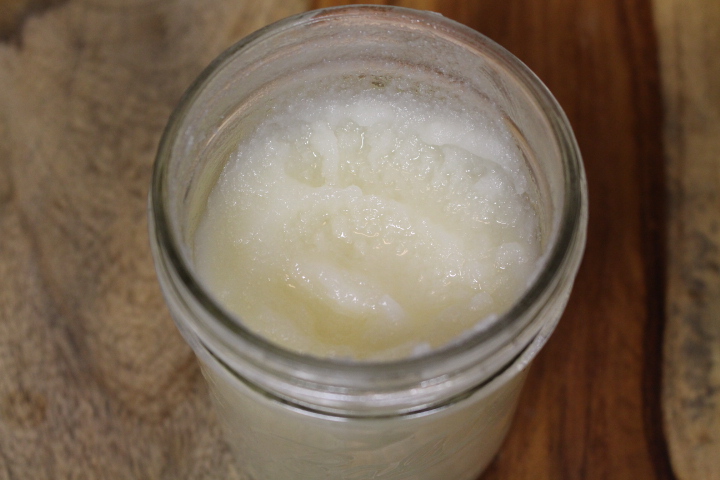
I started using this beeswax and mineral oil butter earlier this year and love it. My dad is a beekeeper, so I’ll probably have an endless supply of beeswax. When applying the butter to wood, I use a generous amount and work it into the wood with my fingers. Allow it to soak in overnight. The next day, wipe off the excess with paper towels and then buff with a clean cloth. The recipe below is 2 parts mineral oil to 1 part beeswax. I’ve seen other ratios in other recipes, so don’t take this recipe as an absolute.
Here is the recipe:
- 8 Ounces (1 cup) of food-safe mineral oil
- 4 Ounces of beeswax
- Small pot & burner
- 12 oz wide-mouth Mason jar
- Paper towels (prefer Viva)
- Cloth towel
- Sterilize the mason jar with some boiling water (or run it through dishwasher). Be very careful here so you don’t burn yourself.
- Pour the 8oz of mineral oil into the pot and set for lowest heat setting.
- Add 4oz of beeswax pellets or chunks. (Look for pellets in your local craft/hobby store)
- Stir the wax around until it melts and the whole mixture is clear.
- Set aside for 2-3 minutes to cool (or longer if it’s hot)
- Carefully pour the mixture in the 12 oz Mason jar. This recipe should almost completely fill the 12 oz jar.
- Keep the lid off and cover the top with a paper towel and allow it to set overnight. Next day, it should look and fill like butter.
- Apply the rubber-gasket lid to seal the jar. Store it in a cool, dark place. You may want label it so people know what it’s for.
Well thanks for checking out my article on how to care for wooden utensils. Please leave you comments below and share any recipes or methods you use to care for your kitchen utensils.
If you’d like to receive more DIY tutorials and tips in your inbox, please consider signing up for my newsletter. See the sign-up form below. If you signup, I will send you the Home Shop Safety & Tool Checklist for free.

Are you starting up a new shop? Want to work safer in your shop? To help you answer these questions I've put together a 2-part checklist -- Home Shop Safety & Tool Checklist.
I will also send you updates of my latest woodworking and DIY projects. You can get all this by subscribing to my free email newsletter.


1 thought on “How to Care for Wooden Utensils”
Comments are closed.