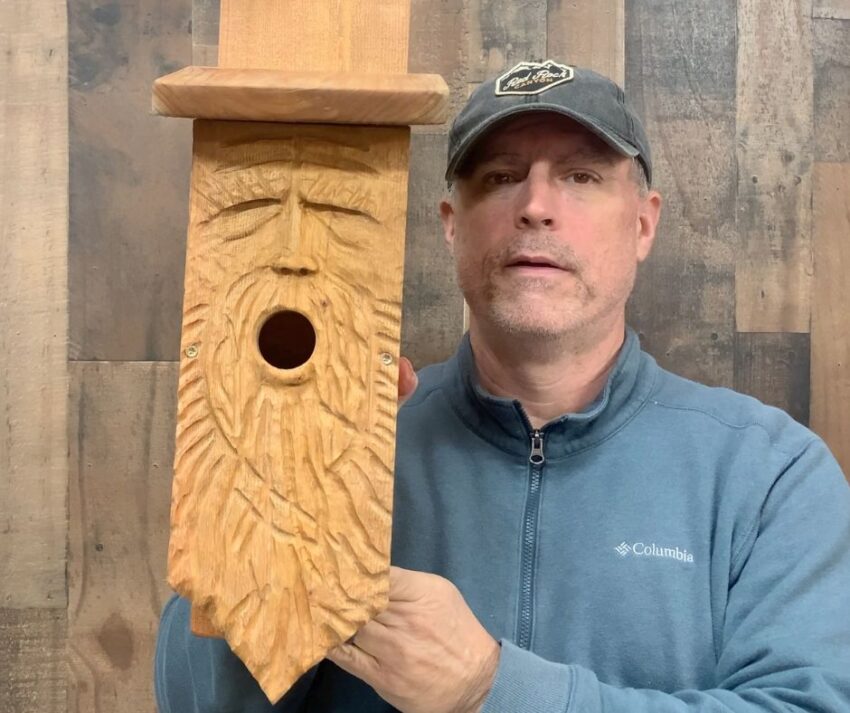
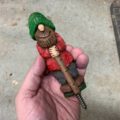
I love wood carving and love attracting birds to my backyard. This tutorial will show you how to carve a wood spirit birdhouse, and I’ll show a few assembly techniques. These make great gifts for just about anyone and especially bird watchers and nature lovers.
The Tools I Used
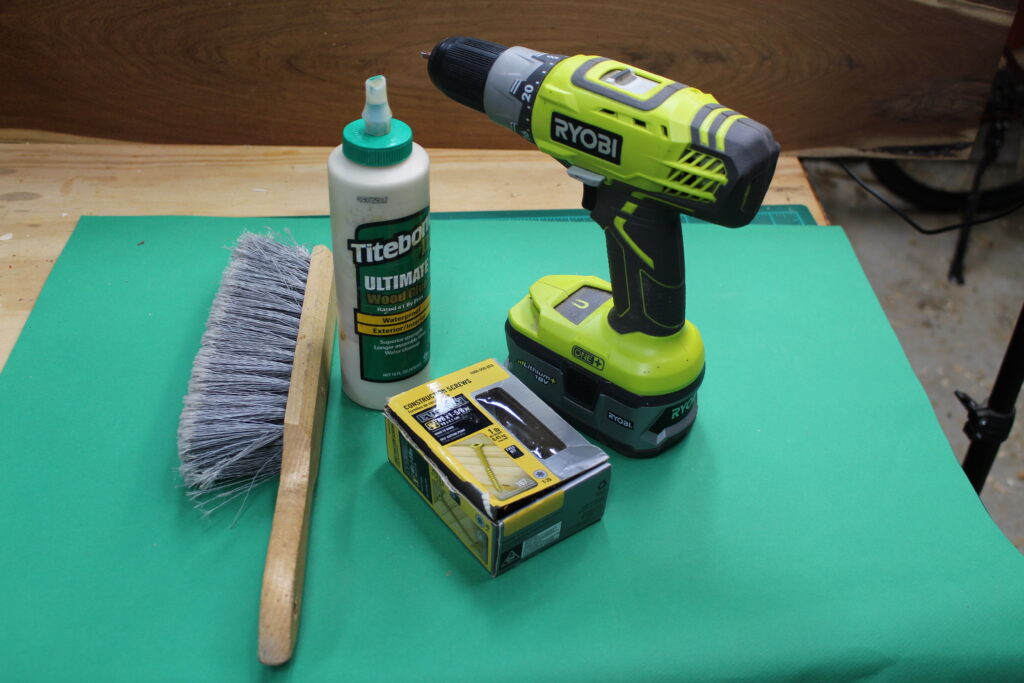
For the birdhouse assembly, I simply used a battery powered drill and #8 1 5/8 inch exterior wood screws. I also used Titebond 3 waterproof wood glue. I cut the boards with a tablesaw and miter saw(look below for my plans). But use any saw that is available to you.
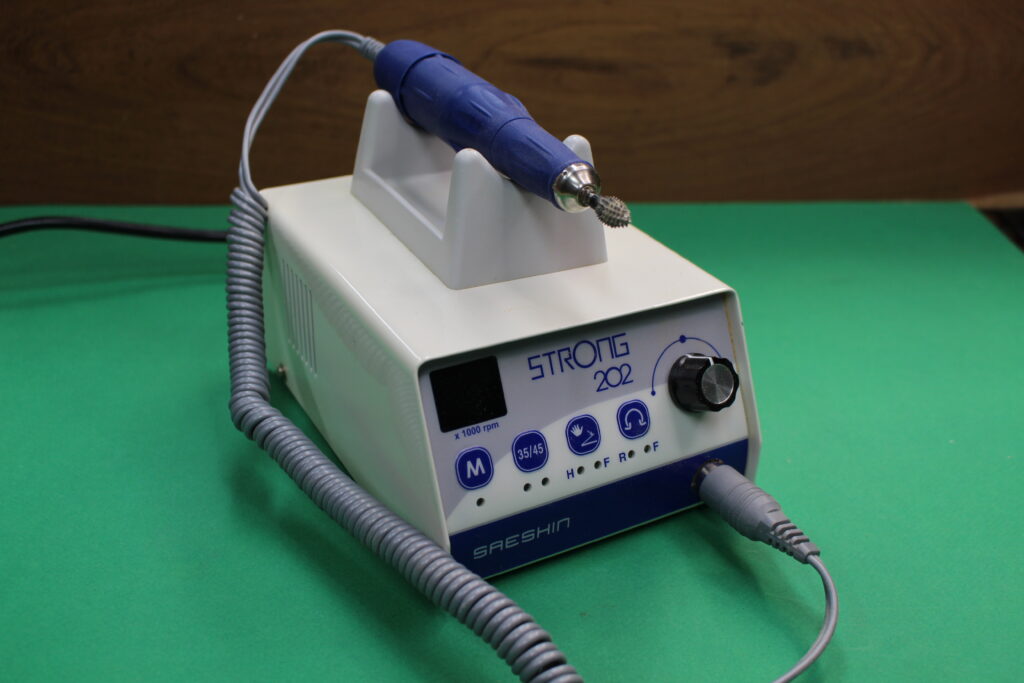
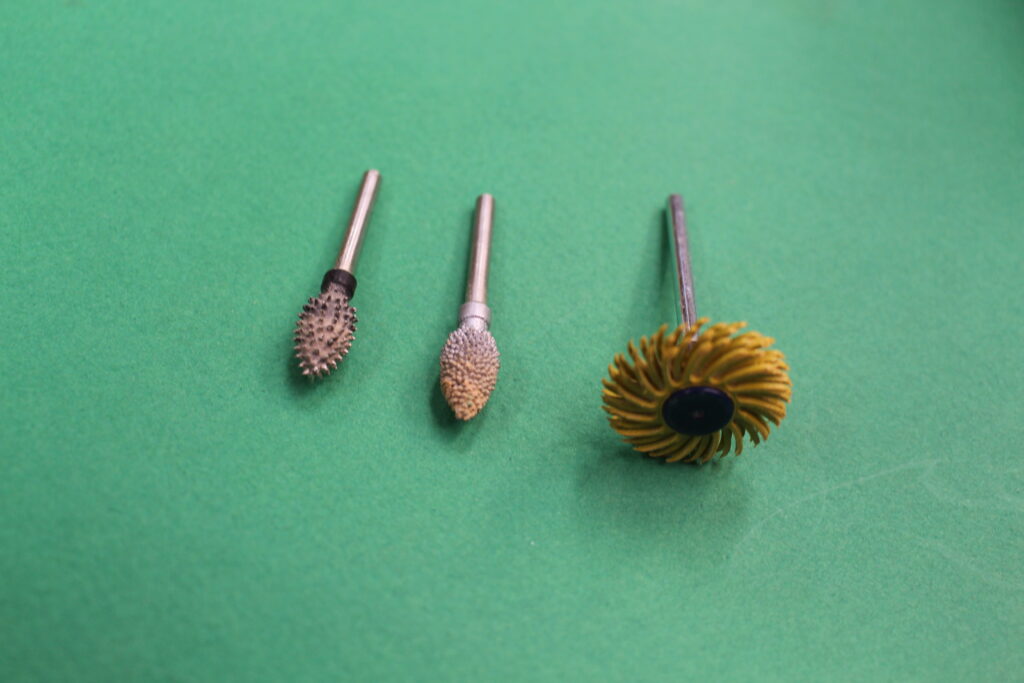
For the carving, I used a Strong 202 Micro Motor rotary tool and a very coarse flame burr. In the past, I’ve used Dremel rotary tools and they do fine for carving. The Strong 202 is a little easier for me to use and the torque seems to be stronger.
Carving and Assembly Instructions
Follow the embedded YouTube video below to see the carving tutorial. In the video, I’ll also show you some of the assembly instructions I followed. NOTE: The top is held down with 2 wood screws and I did not glue the top. Periodically, I plan to clean out old nests, so I need a way to get into the birdhouse. Also, remember that cedar boards can split easily so make sure to drill pilot holes before you screw in the wood screws.
Carving cedar is relatively simple since it’s a soft wood. Keep in mind that you are only working with about a 1 inch board, so you can’t carve too deep. I bought my cedar boards from the local home improvement store. If you have access to thicker cedar boards, that will help you carve deeper facial features. Carving creates lots of dust, so wear a dust mask. I also recommend using a good shop brush or dust collection system.
Birdhouse Plans
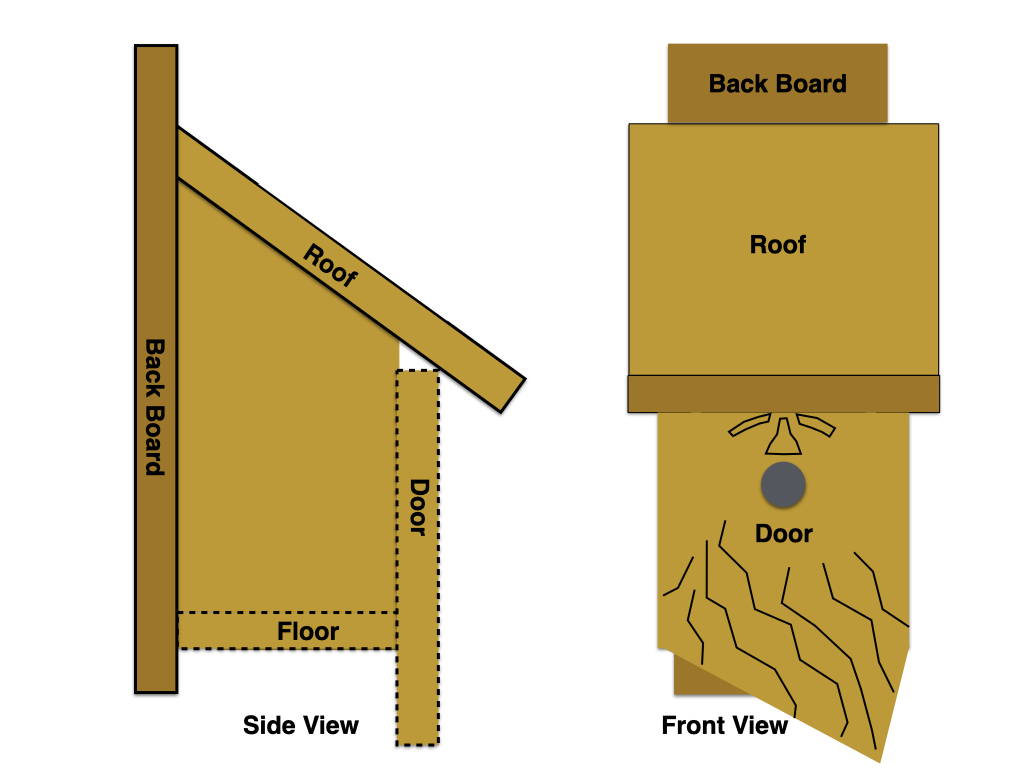
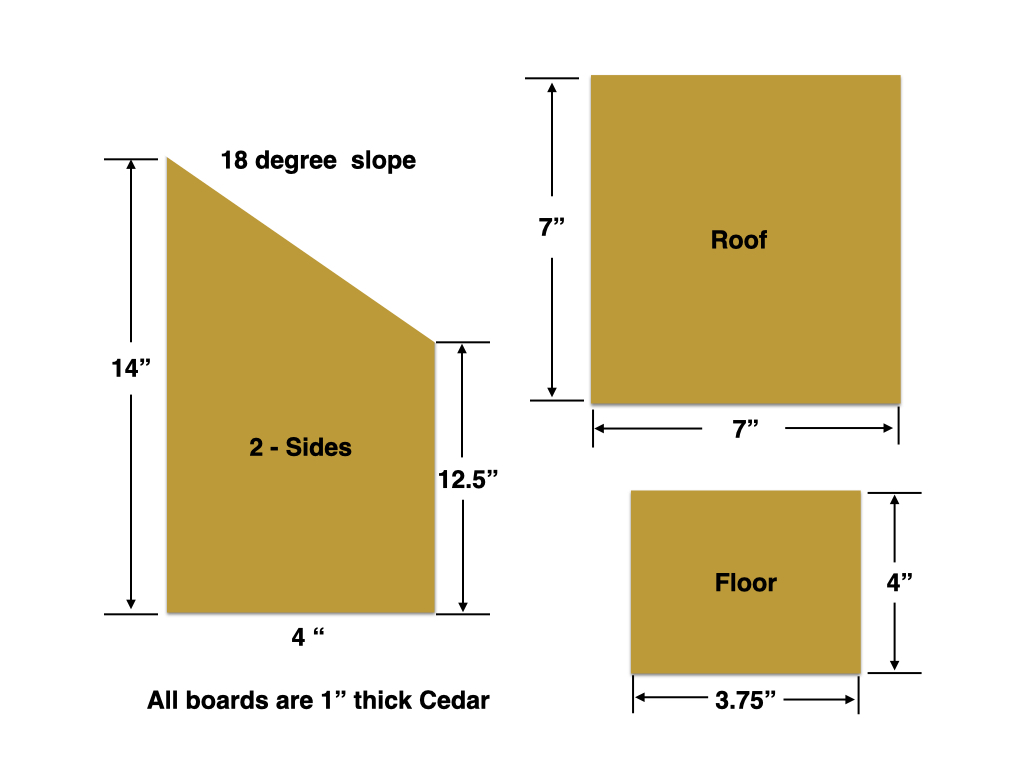
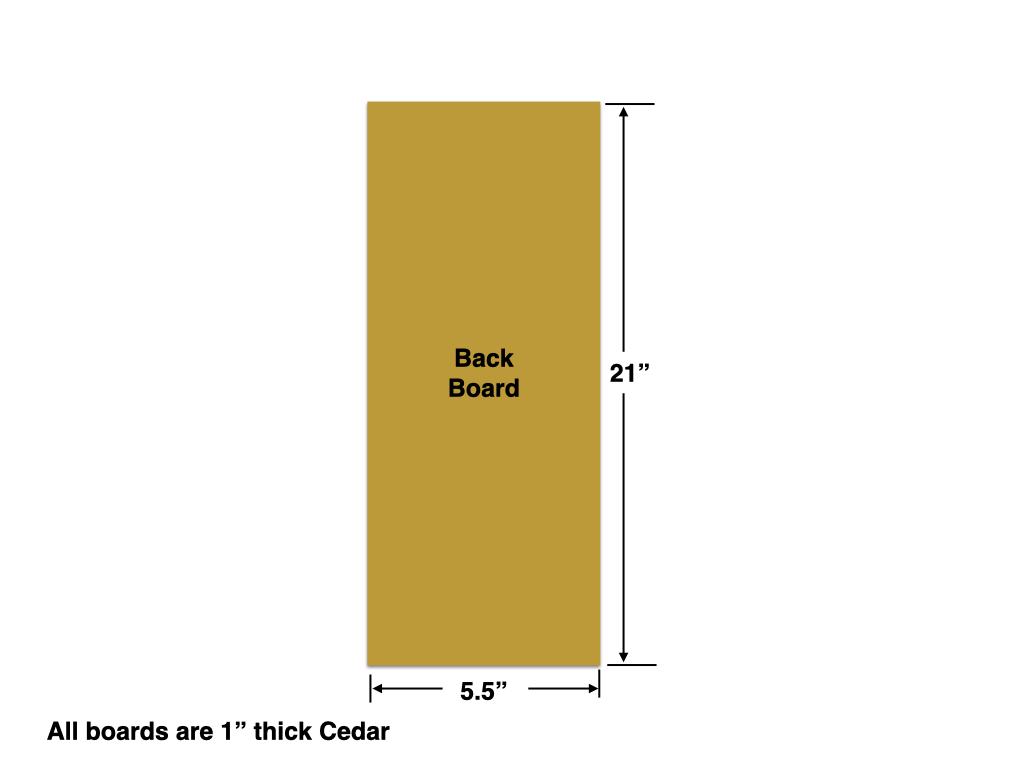
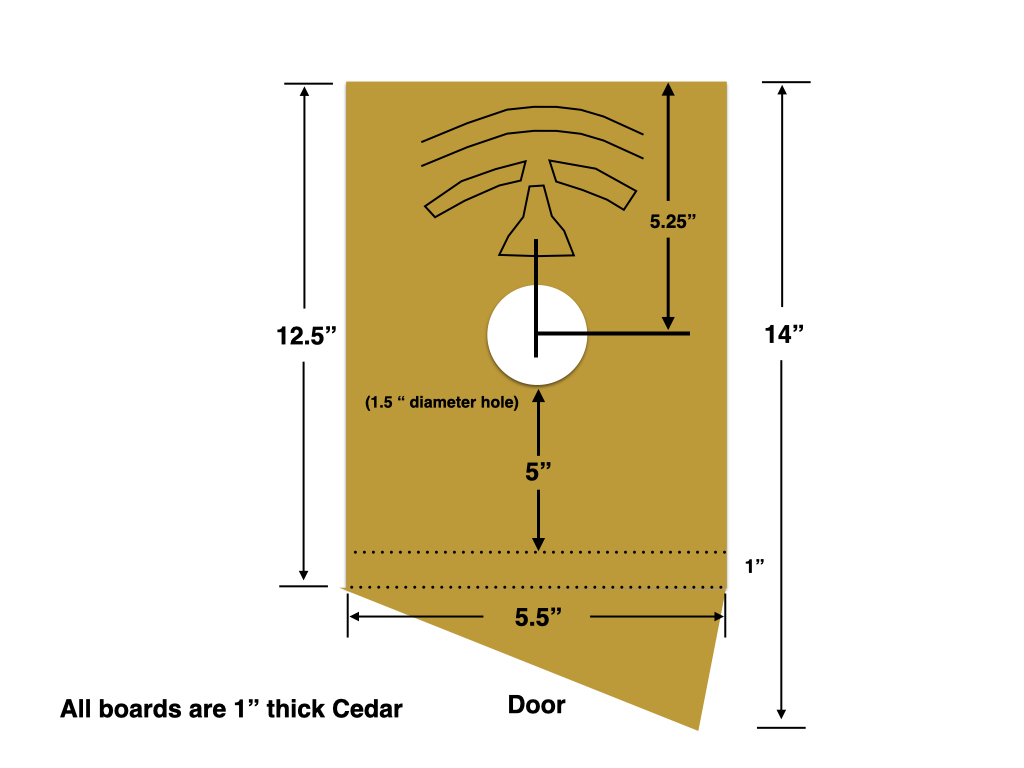
See below my modified birdhouse plans. My plans are designed to mainly attract blue birds. For Blue birds, you want to drill a 1.5 inch hole and the distance from the bottom of the hole to the floor is about 5 inches. On other plans you might see that distance around 7 inches. The inside cavity is roughly 3.75″ by 4″. These are all features to consider for blue birds nesting and hatching their chicks. To help the chicks with fledging, I added several small grooves below the entrance hole (inside the birdhouse). You will also notice that I’ve made some provisions for keeping water out and overall ventilation.
There are many good bird house books and plans out there, so feel free to change these plans up to attract different bird species.
Finishing the Birdhouse
Since I’m using cedar, there is no need to finish or paint the birdhouse. Cedar holds up well and will resist rot and insects. However, to help the wood spirit carving stand out, I used a dark Danish oil. If you decide to go that route, just make sure not to get any finish on the inside of the birdhouse. Also, note that cedar may change color over time as it’s exposed to the sun and weather.
Thanks for reading and watching. I hope you will decide to tackle this project and help make a new home for a blue bird. Please consider subscribing to my YouTube channel or to my website. They both tend to go hand-in-hand.

Are you starting up a new shop? Want to work safer in your shop? To help you answer these questions I've put together a 2-part checklist -- Home Shop Safety & Tool Checklist.
I will also send you updates of my latest woodworking and DIY projects. You can get all this by subscribing to my free email newsletter.
