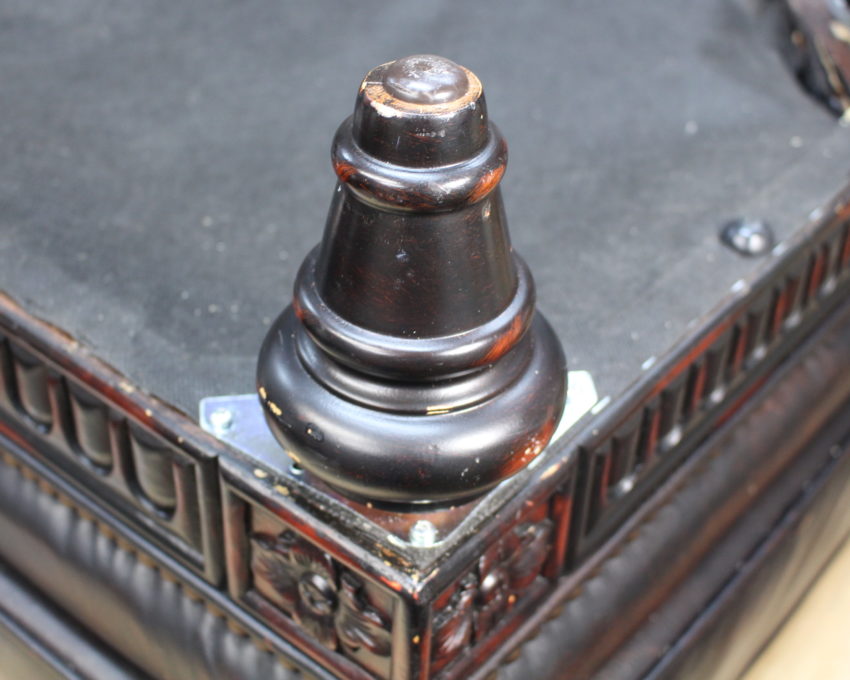
Over the years it seems like I’ve constantly been repairing loose furniture legs. Just a week or two back, one leg came off our hassock. And I’ve had several mess up on the sofa. So it seems like I’m always researching how to fix a loose sofa leg.
The kids, pets (and sometimes adults – LOL) like to plop down on our furniture, but unfortunately that loosens the hardware that screws into the base of the furniture. And they just don’t seem to make furniture like they used to. The quality workmanship has definitely gone down over the decades. But they still want to charge and arm and a leg for new furniture.
All this has prompted me to write today’s article to share my own experiences and reveal what solutions have worked for me. No, I can’t guarantee my way will work for you, but I’m fairly confident it will.
Let me get straight to the solution I have used most often. I have started using the metal bracket shown in the photo below this paragraph. You can get these from your local home improvement store, and they’re between $2 and $3 each. They’re very easy to install and you’ll need a screwdriver and a drill.
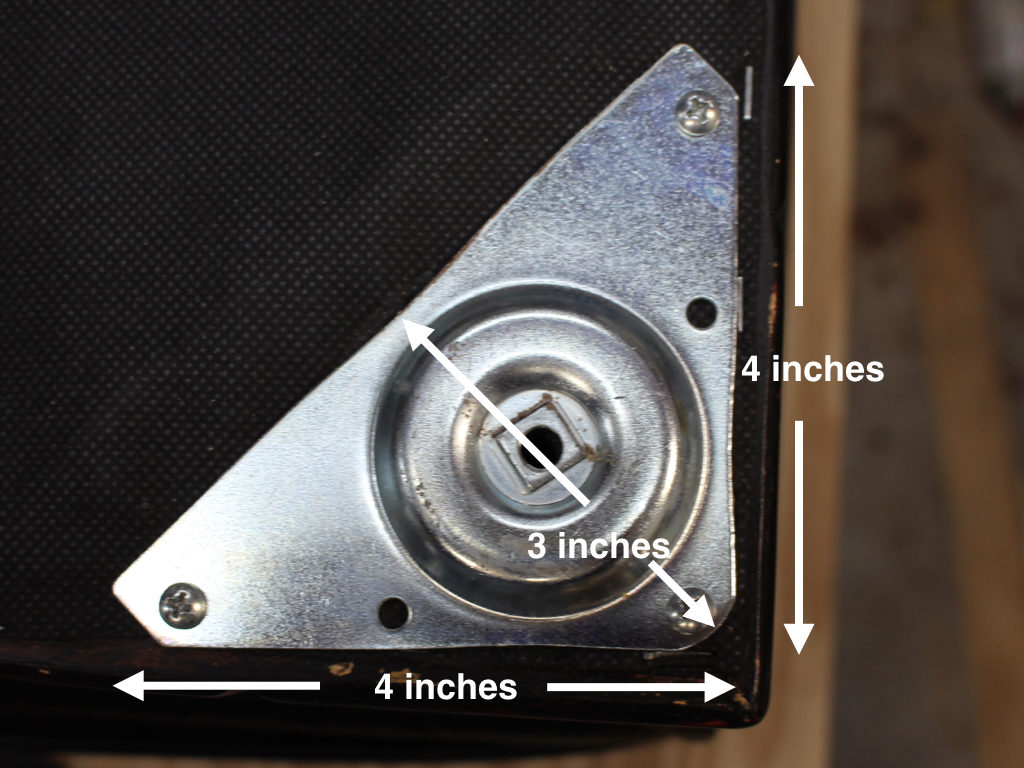
Before you go out and buy these brackets, follow my tutorial below to make sure this will work on your furniture.
For the example in this post, I’m showing a repair for the leg on my hassock, but this is identical to my sofa leg repair. Your furniture leg most likely will be different than mind, but you should be able to follow the same principles I’m showing you in this article.
Bracket measurements
Look over the bracket measurements (photo above) to see if they’ll work with your particular furniture problem. You’ll need to make sure you have some wood support, so you can screw the metal bracket to your furniture. Also, the way this bracket is designed, it may cause your legs to protrude out further than normal. So, you might want to go ahead and attach brackets to the other legs. It’s not that hard to do and it’s cheap.
So what’s the root problem?
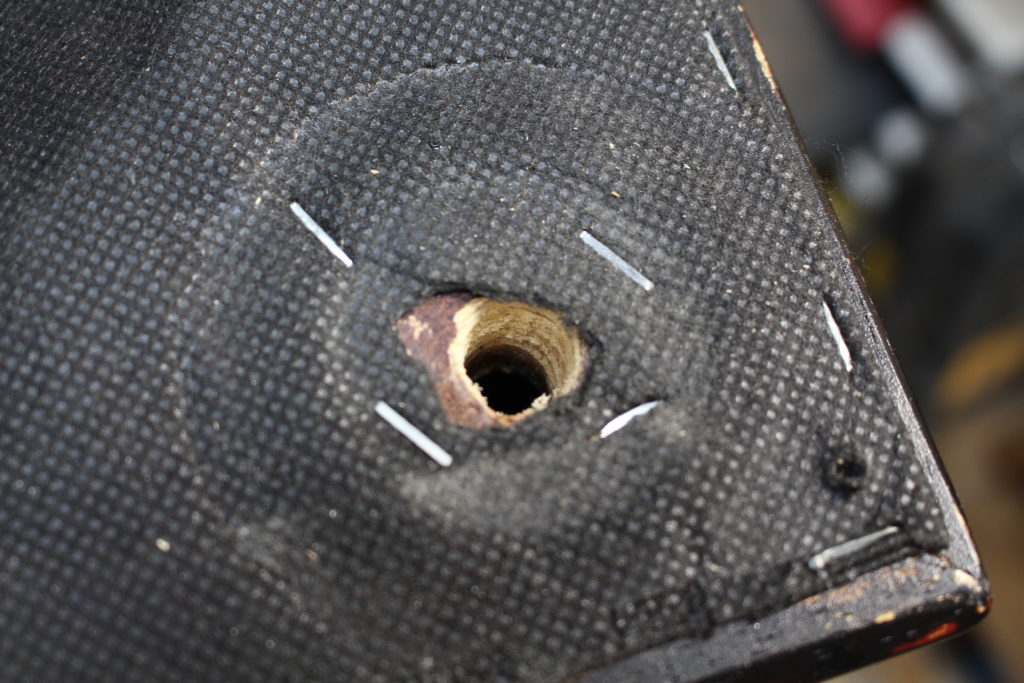
If you look at the photo below, you’ll see that the original T-nut or insert nut hardware has totally stripped out. You’re left with a fairly large stripped out hole. I’ve tried going and buying new T-nuts, but the hole is so big It won’t attach like it originally did. So, you normally will need to patch up the hole, which we’ll discuss later in this article.
I’ve also tried the toothpick method or golf tee method where you glue those items into the hole and then screw the leg back on. This method will sometimes work, but lately I’ve preferred using the metal bracket.
What you’re going to need for the repair?
- A bracket for each leg you want to change. Five attachment screws come with the bracket.
- A phillips screw driver and a battery-powered drill.
- You may need some pliers to unscrew the hardware on the leg. You can use channel lock pliers or vise grip pliers.
- You may need a new hanger bolt to match with the metal bracket. If you use my alternative fix (toward the end of this post) then you may need a new T-nut or insert nut and some epoxy.
The piece of hardware that’s screwed into your furniture leg is referred to as a hanger bolt (see photo below). You’ll notice that one side has machine threads and the other side has wood screw threads. The screw side is what’s imbedded in your furniture leg.
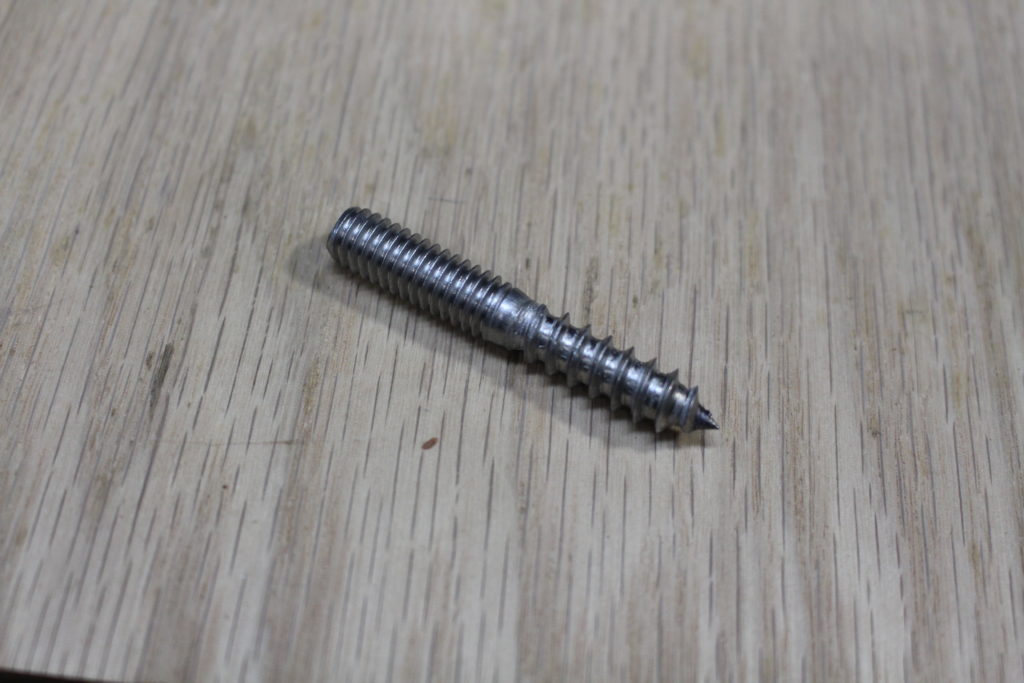
The side with the machine screws will either go into the bracket or a T-nut (or insert nut). Make sure the existing hanger bolt on your legs will work with the bracket. To make sure, you can twist the hanger bolt (see photo above) out that’s attached to your leg.
Be careful not to mess up the threads. Take the hanger bolt with you to the store and test to make sure the machine threads fit the bracket. If it doesn’t, then no problem. Just walk over to the hardware aisle and find a hanger bolt that will work. Just make sure you don’t get one that’s smaller than your existing hanger bolt. And, like I said the machine threaded side needs to fit the metal bracket. Or the T-nut (if you decide to go with my alternate fix method). None of this hardware is very expensive.
When you’re back home, carefully screw (with vice grip pliers) the hanger bolt back into the furniture leg. Again, try not to mess up the machine threads that will screw into the metal bracket. Tip — don’t place the pliers on the end of the hanger bolt. Keep it in the middle.
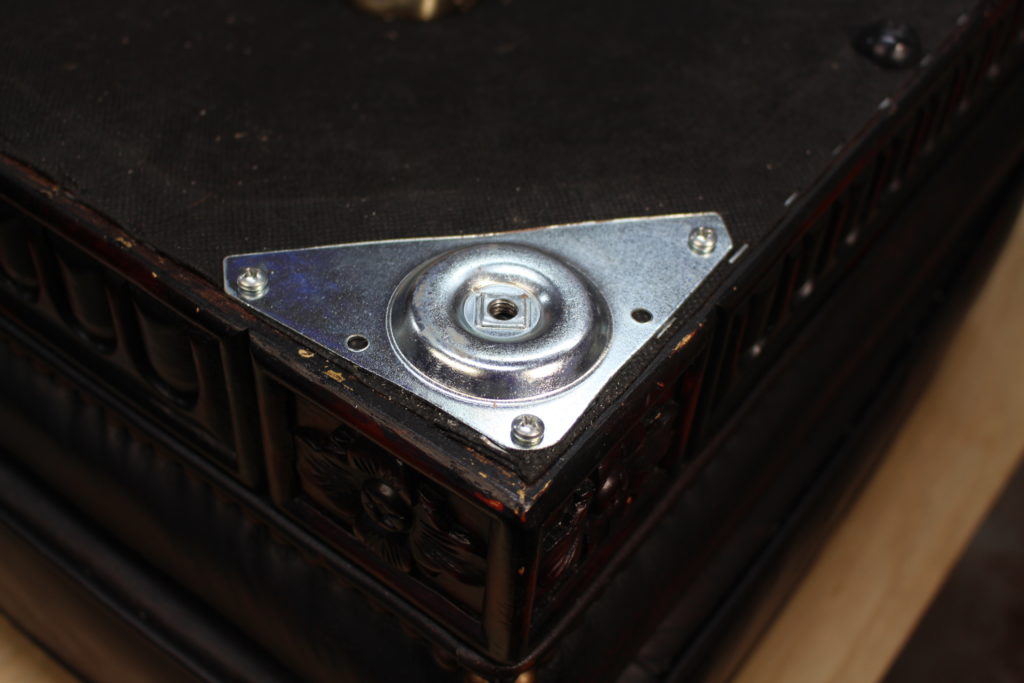
Lay the bracket over the stripped out hole and attached it to the furniture’s wood frame, using the five screws. The 5 wood screws come with the bracket. See the photo above (I only used 3 screws). Hopefully, you can see how the bracket will make the leg protrude out more. Unfortunately, the bracket is not flat all the way across. It has a bulge in the center.
There are a couple ways around this and one I’ve already mentioned. You could go ahead and install brackets on the remaining legs and therefore all the legs should be level with each other.
Another option is to chisel out a small recess in the wood and turn the bracket upside down so the bulge will fit in the recessed area. But this will require some extra work. One side of the bracket has a bulge and the other side is flat.
Screw the leg back onto the metal bracket.
Now, that you have the bracket attached, you can simply screw the leg onto the metal bracket. If you like, you could put a lock washer between the bracket and the leg. Just hand tighten and don’t get overly aggressive with it.
Check out my video below if you want to see me go through the process. The video will just show how I installed the metal bracket and reattached the leg.
Alternative way to fix
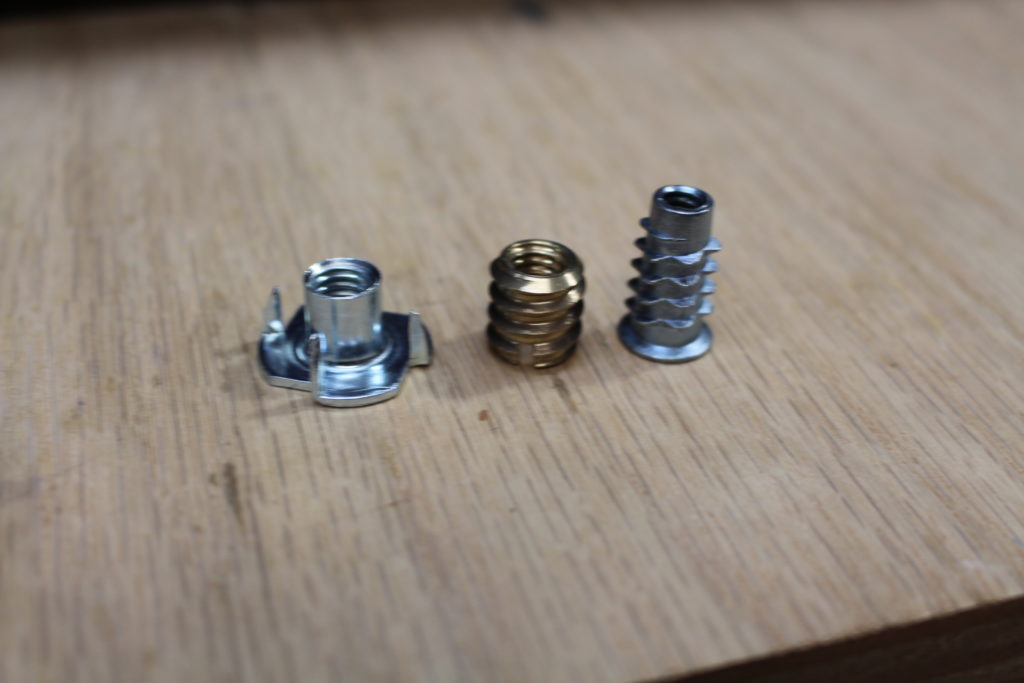
I mentioned another way to repair your sofa leg and you could try this other method. Go to your home improvement center and select a new T-nut or insert nut. See the photo below to see what I mean. T-nut is on the left and two kinds of insert nuts on the right. Just make sure they will screw onto your hanger bolt correctly.
Next — you’re going to need a way to patch the stripped-out hole.
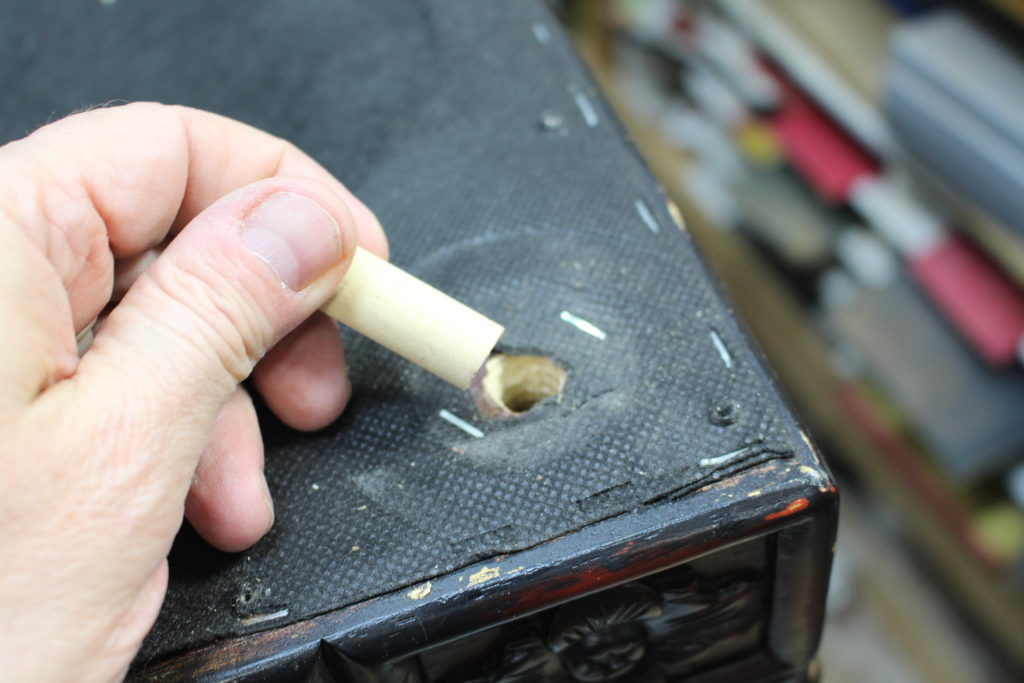
Find something like toothpicks, a wood dowel, or maybe golf tees and glue those in the stripped out hole. I prefer wood dowels for this. Allow the wood glue to thoroughly dry.
(It’s important to use some type of wood (like toothpicks or dowels) so the T-nut will have something solid to attach to. If you use something like wood putty, it’s just not going to be strong enough and won’t hold up over time.)
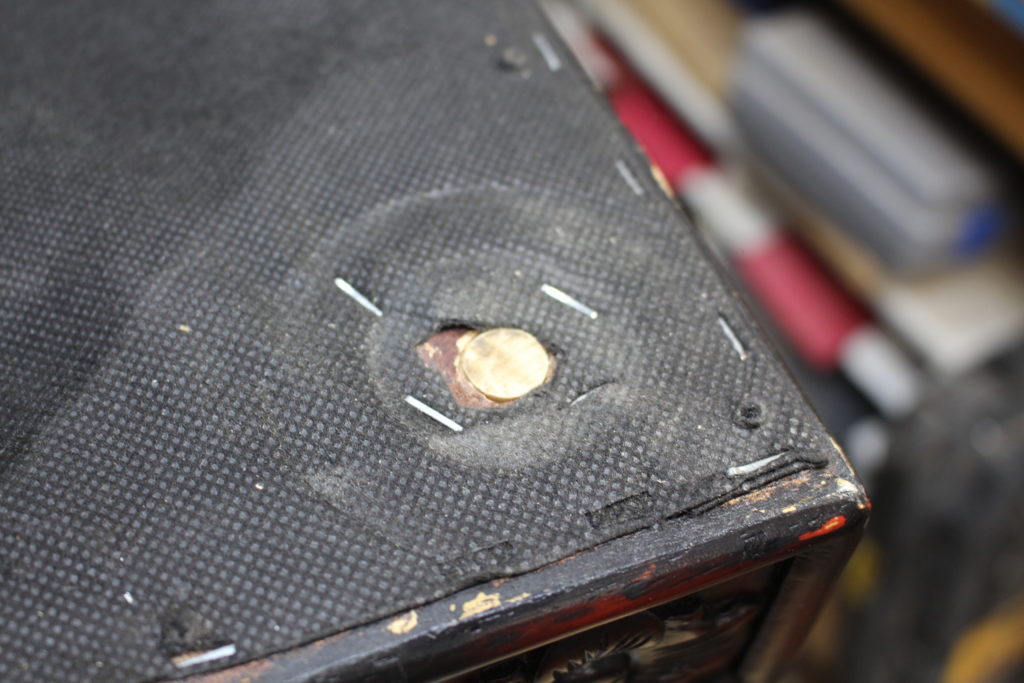
After the dowel has glued up well, take a small hand saw and saw off parts of the dowel that are sticking out. Drill an appropriate size hole for your new T-nut or insert nut. When you install the T-nut or insert nut, I recommend putting some epoxy on it to help hold it better in the hole. Follow instructions on your epoxy packet for cure times. See photos below.
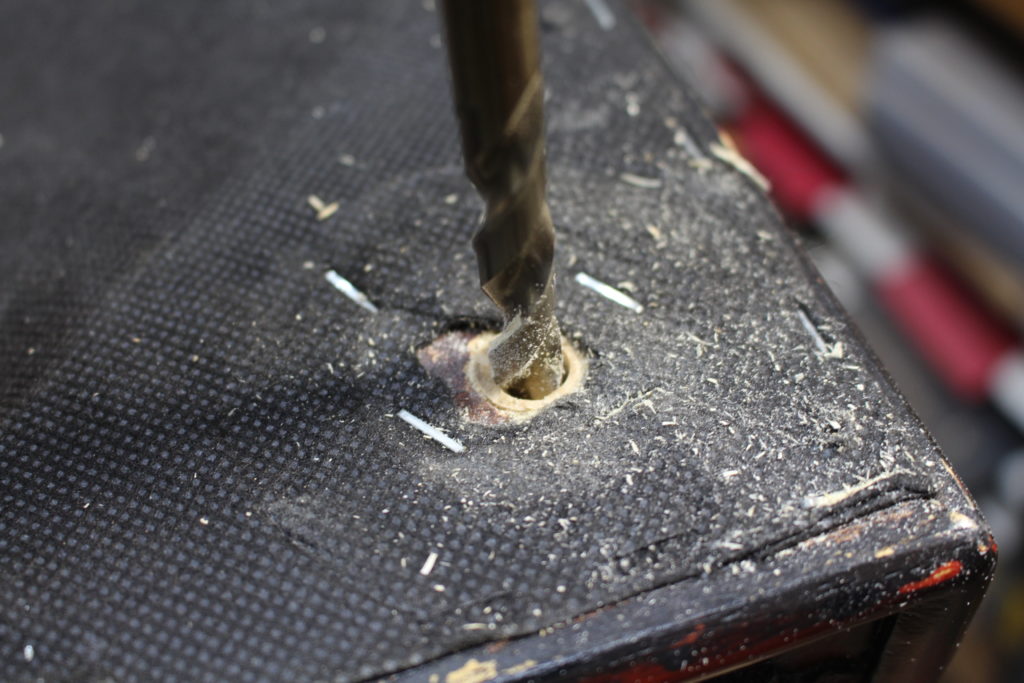
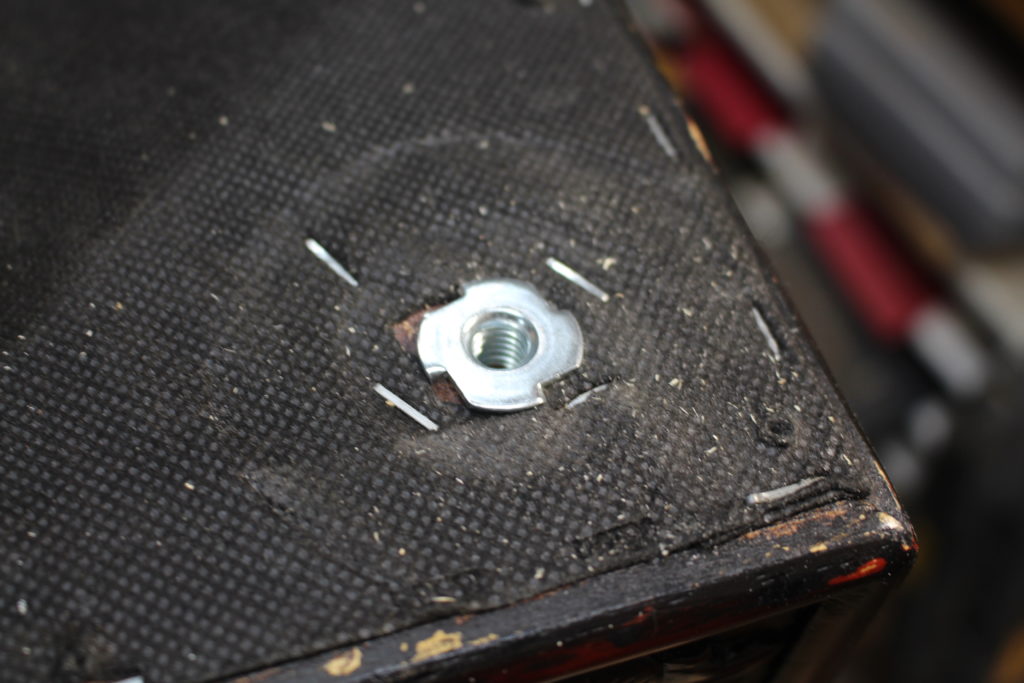
Then you can screw the threaded end of the hanger bolt back into the T-nut or insert nut. See photo below.
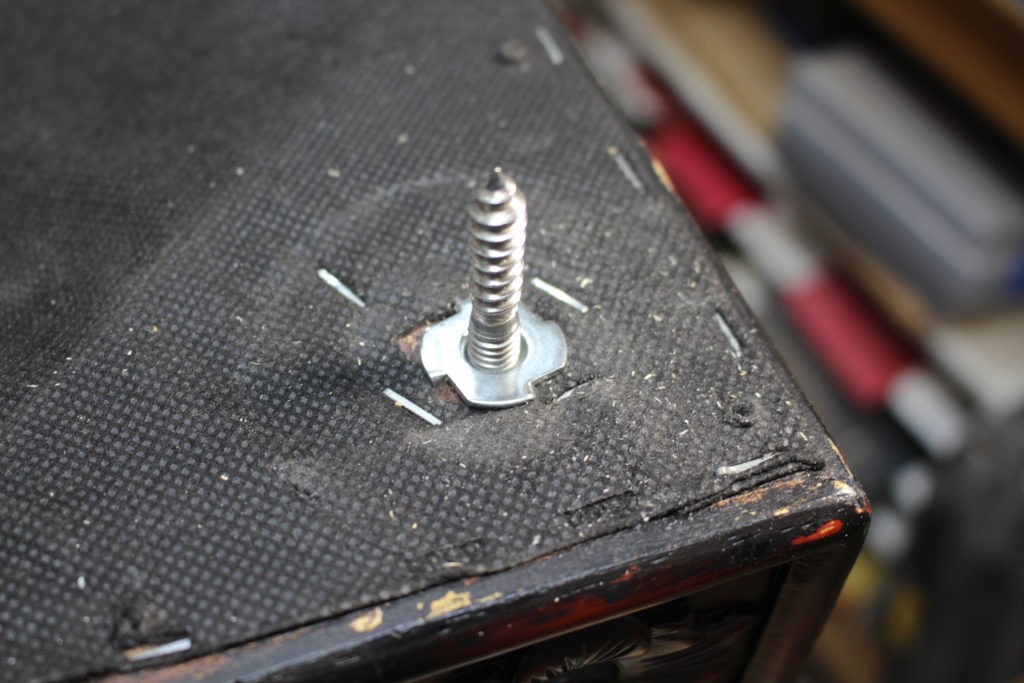
This method has sometimes worked for me, but I believe the metal bracket method is easier and it will hold up longer. You could try experimenting both ways and see what kind of results you get.
Related Question: What if the sofa leg is broken?
If the leg itself is cracked or broken, then there are several options you might try. If it’s cracked, I would try to squeeze a generous amount of wood glue into the crack and use a clamp to close the crack up. Wipe away any squeezed out wood glue. Allow it to dry overnight.
If that won’t work, try finding another leg that will match. You could go to a furniture store and see if they supply leg replacements. Home Depot and Lowe’s have these, but they may not exactly match the original leg.
If you’re a wood turner or know a wood turner, you could probably take off one of the good legs and use that as a model to turn a new leg. This option would take much more time and skill, but it’s doable.
The other challenge would be finding a stain or paint to match the original.
Now it’s your turn
I’m sure there are different ways to pluck this buzzard. I hoped you’ve learned some new ways to repair loose sofa legs. Please use the comment field to share alternative ways you’ve repaired loose furniture legs. I hope this post was helpful. If you like this post, please consider subscribing to my monthly newsletter.

Are you starting up a new shop? Want to work safer in your shop? To help you answer these questions I've put together a 2-part checklist -- Home Shop Safety & Tool Checklist.
I will also send you updates of my latest woodworking and DIY projects. You can get all this by subscribing to my free email newsletter.
