In this tutorial, I’ll demonstrate how to make a Giant Jenga-Like Yard Game with carrying case.
Just to be upfront, my daughter helped me on this project and did 98% of the project. I’m so proud of her and her artistic side and willingness to learn something new.
Overall, the giant jenga-like yard game is a fairly easy project. Just cut 48 blocks of wood and build a simple box to hold them. To make it look nice, my daughter did a little painting and staining. We also added handles and a bottle opener.
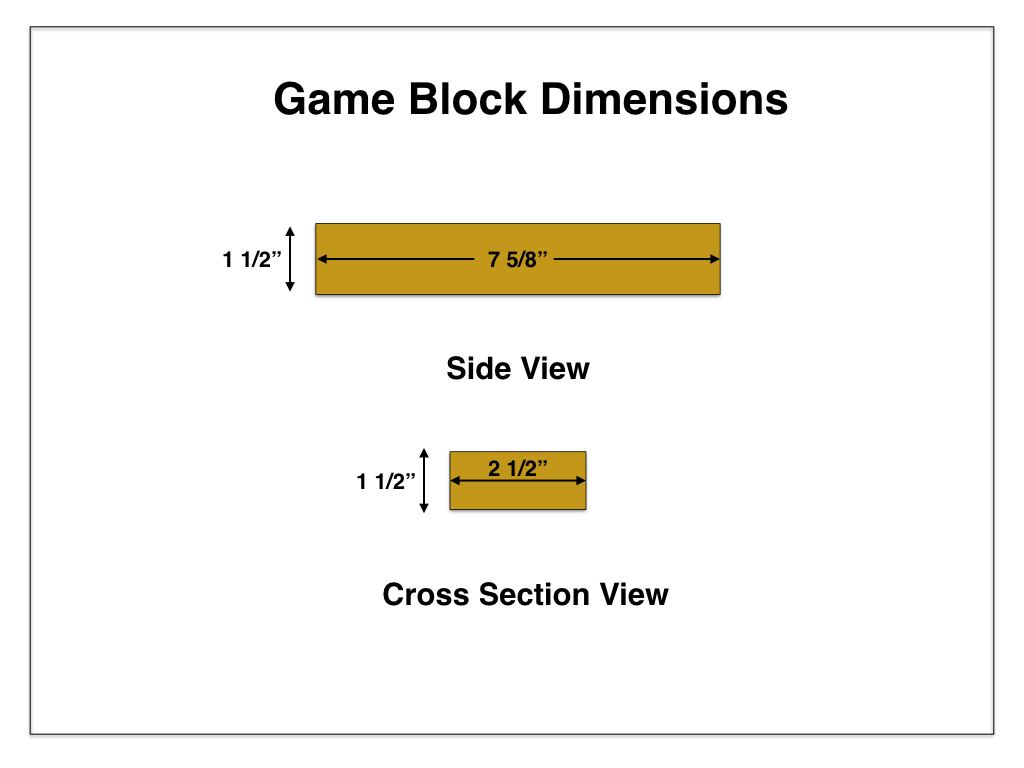
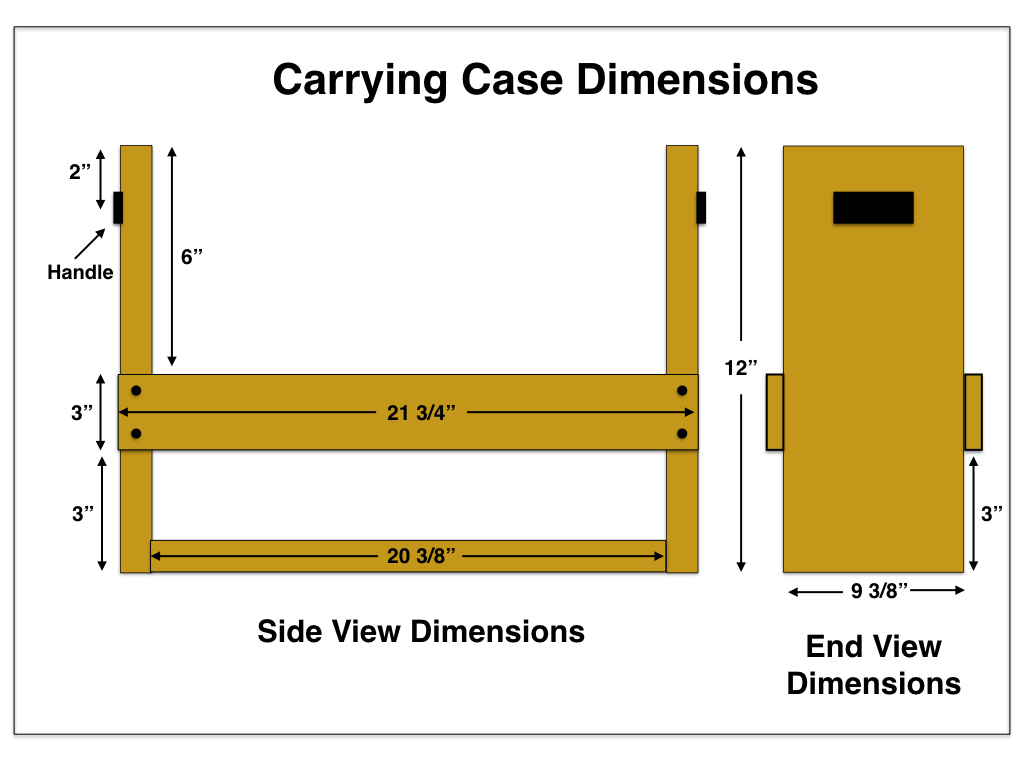
Plans and Materials
See the plans in the photos above. Your home improvement store should carry 2″ X 3″ X 8 ft. lumber and you’ll need 4 of those boards for the blocks alone. I believe these are select pine so they have fewer knots. Note that the actual measurement of these boards are 1.5″ X 2.5″ but they are called 2 X 3 in the store. NOT to be confused with 2 X 4 lumber.
I used 3/4 inch plywood, but you won’t need a full sheet. You can probably get by with 1/4 or 1/2 sheet of plywood. You can make the whole carrying case with the plywood.
You will need at least 8 – #8, 1″ wood screws for assembling the rails. And 6 smaller screws are needed for the handles and bottle opener. I used a pocket-hole jig (Kreg Jig) to attach bottom board to the side boards, so I used the wood screws (6 total) that came with the Kreg Jig.
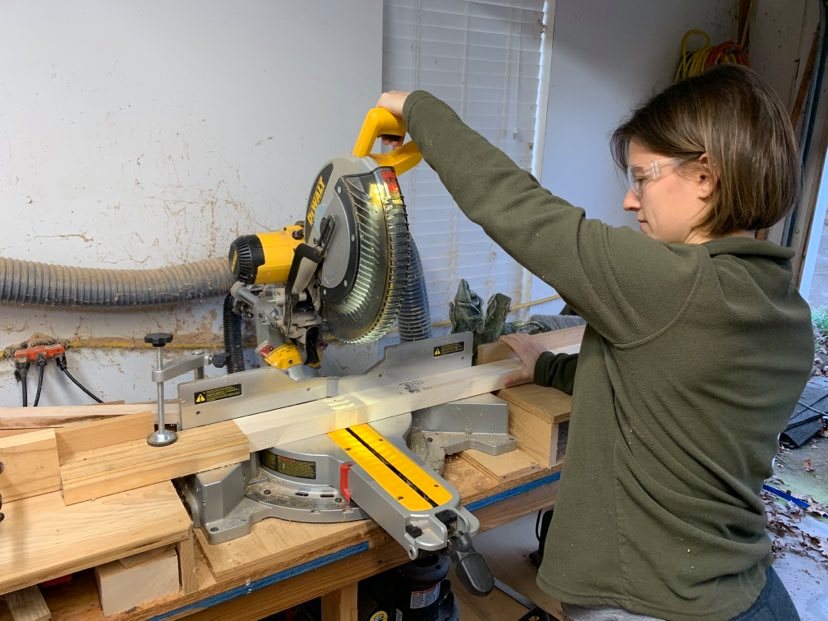
Step 1 – Cut the Blocks
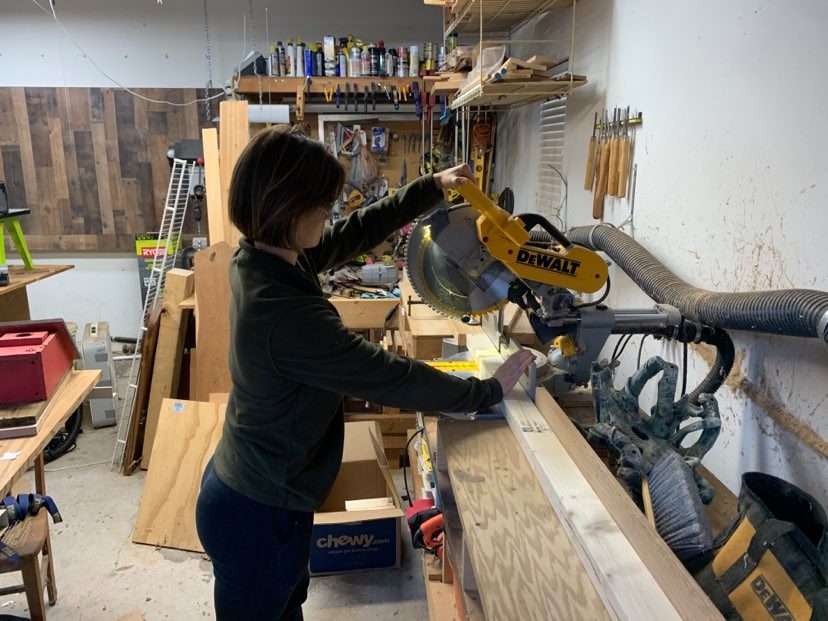
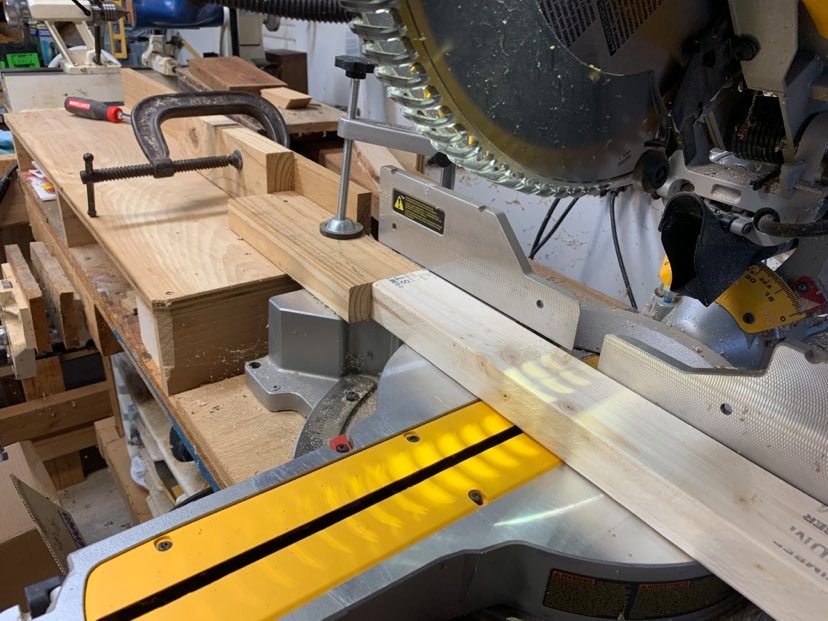
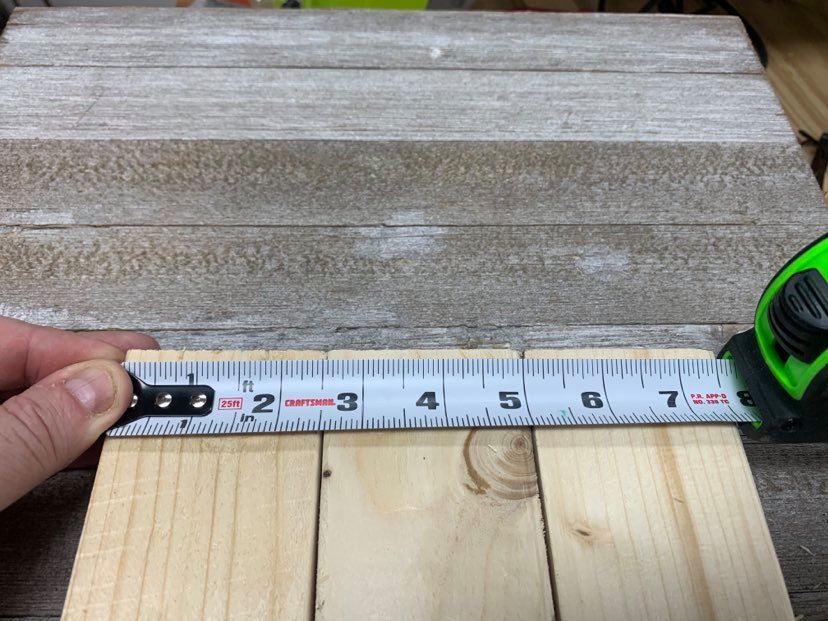
In the photos 1 & 2 above, you see my daughter cutting out the blocks for the Jenga-like yard game. In the store, these boards are labeled 2 X 3 X 8, but actually they are 1.5″ by 2.5″ by 8ft. The length of each block 7 5/8″ comes from the measurement we took by putting 3 of the 2 X 3’s side by side (see photo 4). So make adjustments to your block length accordingly since 2 X 3 dimensions may vary slightly from store to store.
Photo 3 is the heart of the operation, if you have a miter saw or chop saw. Once we knew the length of the block, we used a stop block to cut all the blocks an identical length.
If you don’t have a chop saw, no worries. Just use whatever saw you have to get a nice square cut and try to make the length of each block nearly the same. If you’re off by 1/8 of an inch or so, it probably won’t be that noticeable.
Step 2 – Sand the Blocks
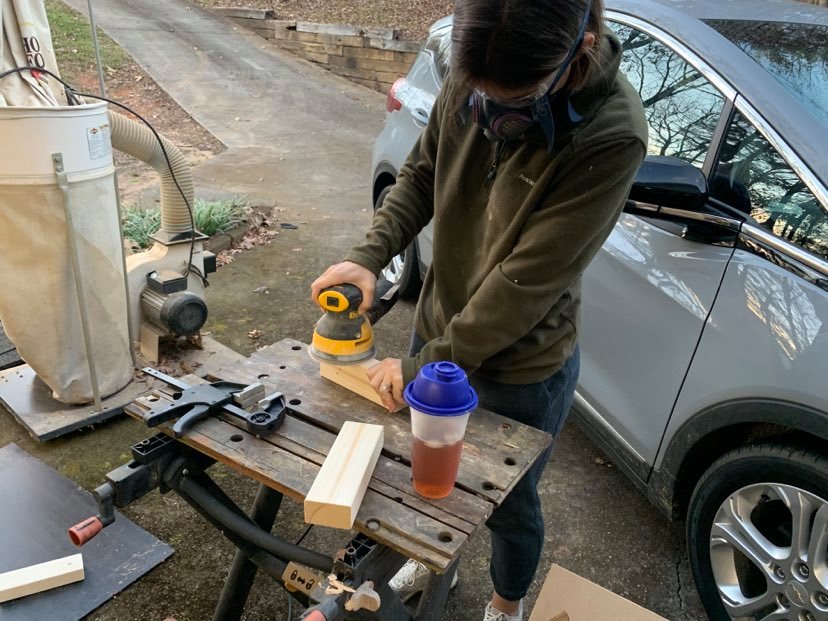
Honestly, this was the most time-consuming part of the whole project. We used an orbital sander to go over each block to smooth them out and get rid of potential splinters. 120 and 200 grit are sufficient for this step. This will also improve the performance of the game by making it a little easier to pull the blocks out. Don’t forget to wear a dust mask.
Step 3 – Paint the Blocks
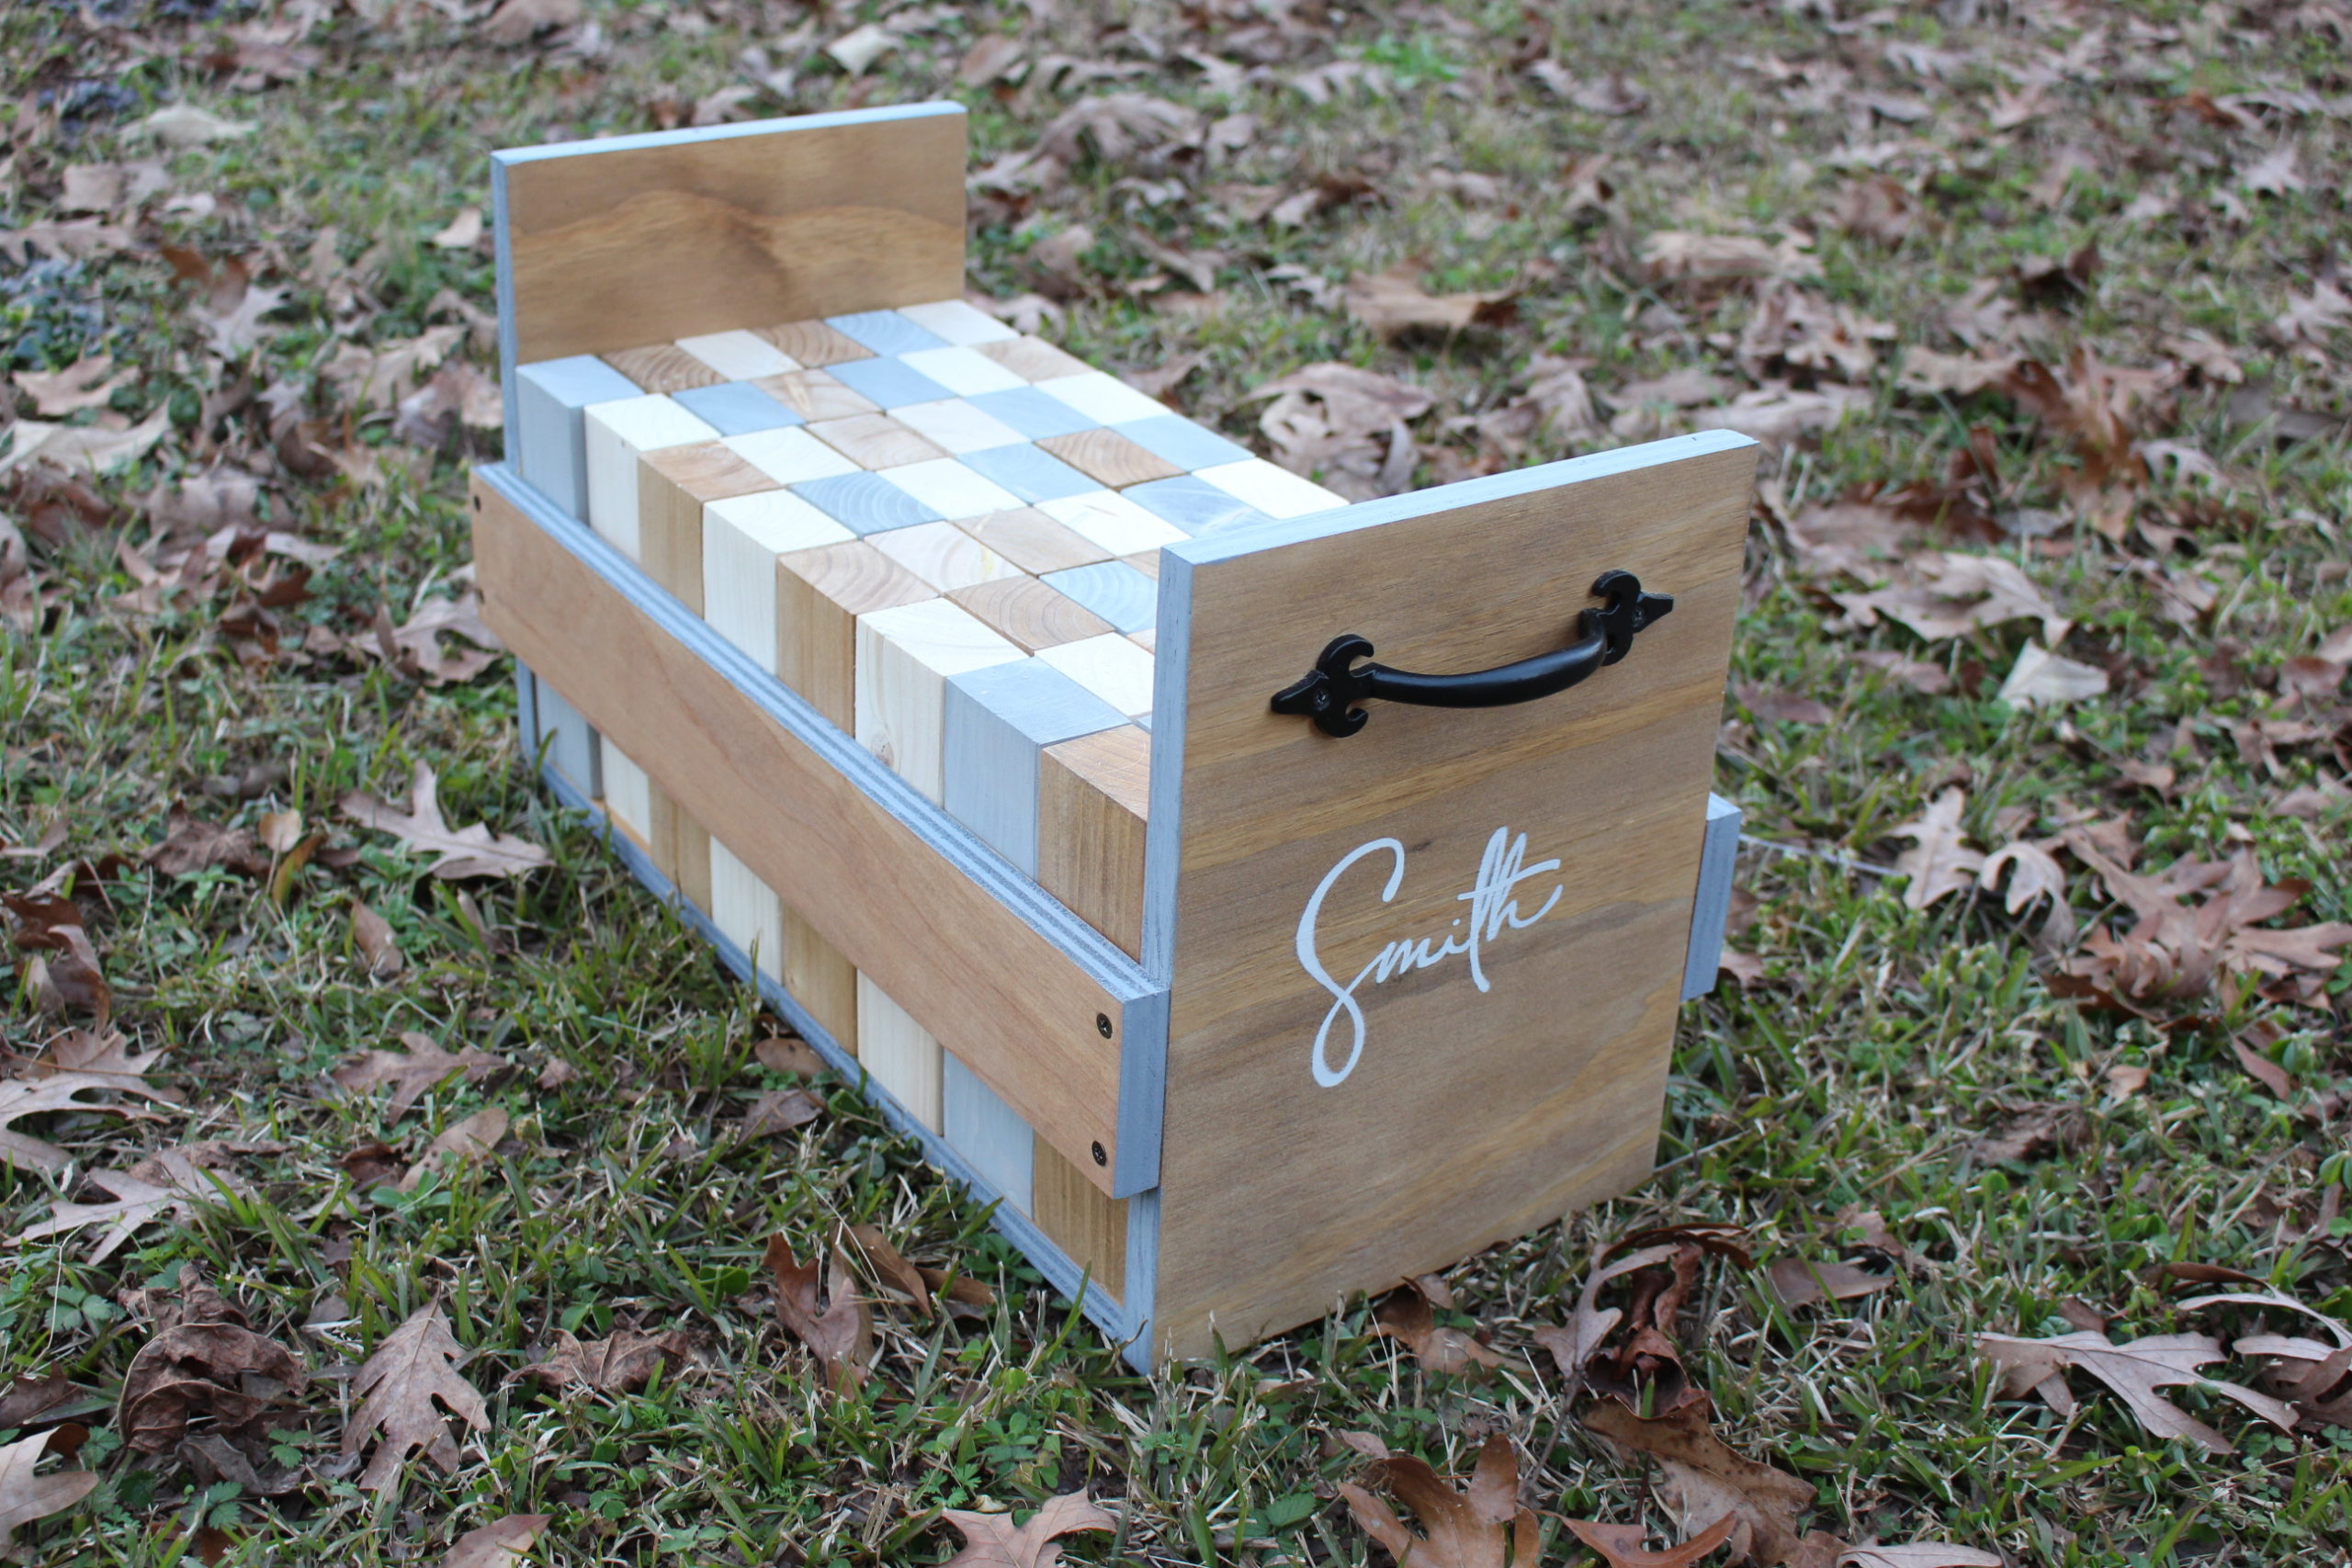
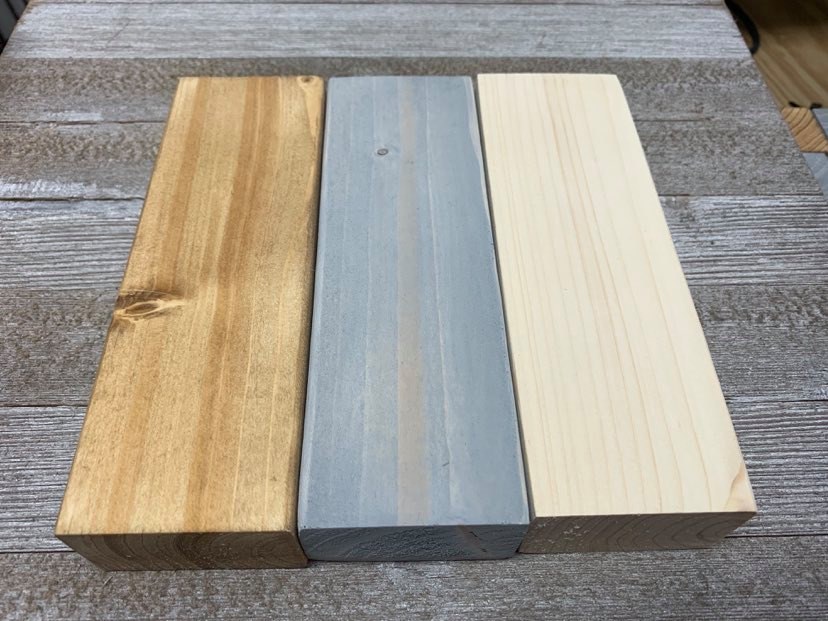
My daughter decided she wanted some of the blocks to be stained and some to have a light blue color and some just plain wood. It’s a total of 48 blocks, so 16 stained, 16 light blue and 16 plain. For the stain, she used a Danish Oil (medium walnut) and regular light-blue paint thinned with water to make it a stain. I would allow the Danish oil a few days to fully dry, but the paint will dry faster.
Part 2 – Making the Carrying Case
Step 1 – Cut the Boards to Dimensions
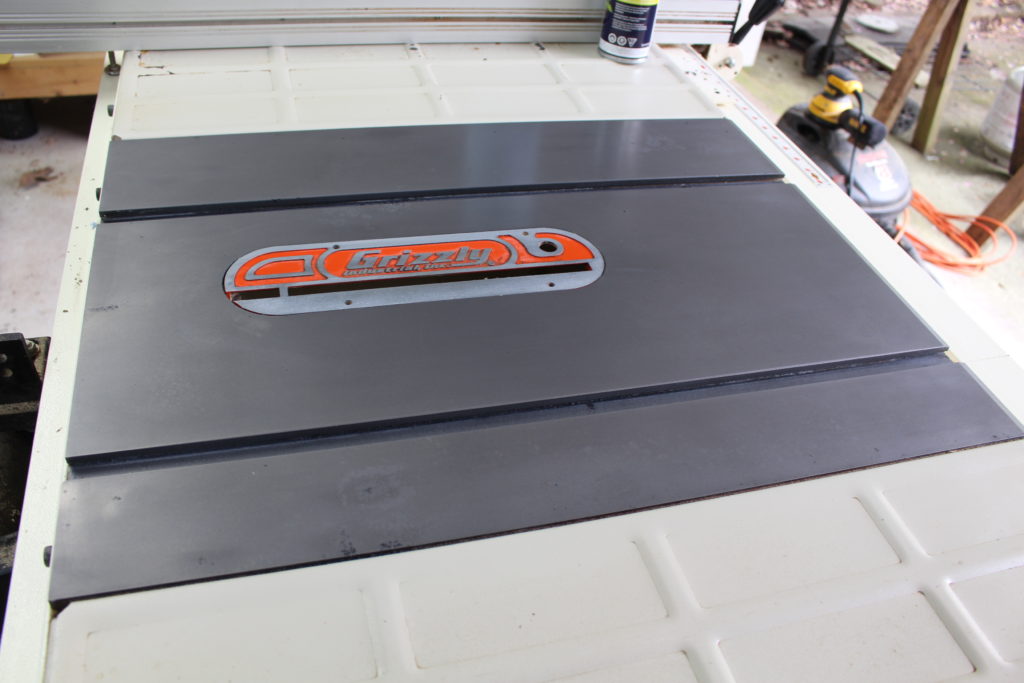
Before you use my dimensions, I highly recommend that you arrange YOUR blocks as they would fit in the box. Take those measures (length X width) and adjust mine if needed. The reason I mention this is because the lumber you purchase could have slightly different dimensions than mine.
I recommend using a table saw or miter saw to get nice square cuts, but use whatever saw you have at your disposal. Be safe and wear your safety gear.
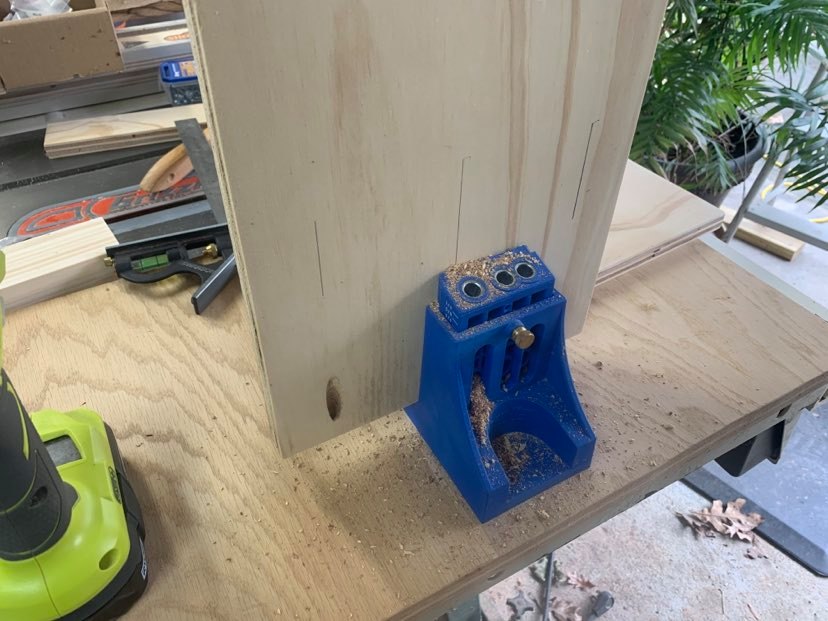
With the bottom board and side boards cut out, I decided to use the Kreg Jig to attach the bottom board to the two side boards. I simply used the pocket-hole jig to make 3 holes and then used the screws that came with my Kreg Jig to join the boards.
Step 2 – Assemble Carrying Case
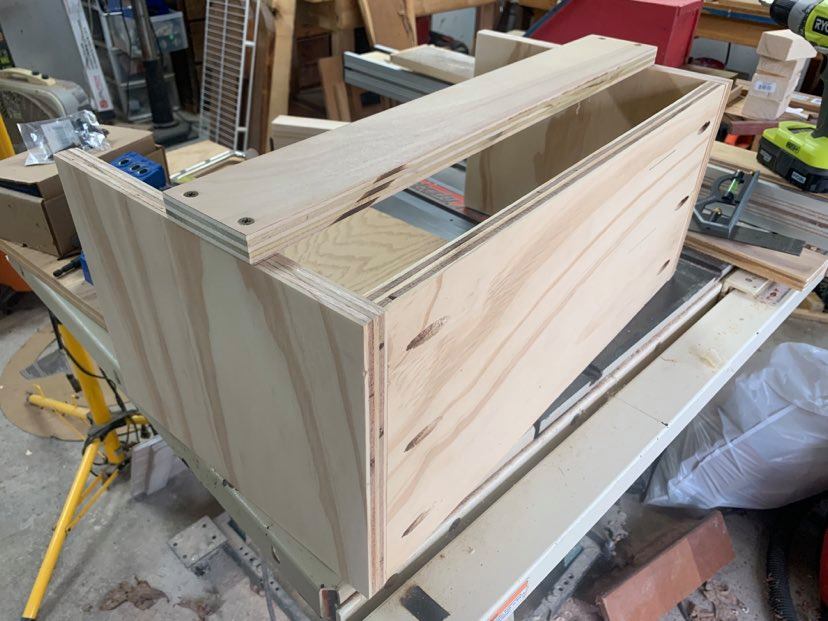
In the photo above, I’ve assembled the carrying case and used 3″ by 21 3/4″ plywood as rails to complete the box. You can see the Kreg Jig holes and how I’ve attached the bottom board to the sides. The rails take 4 — #8, 1″ wood screws for each rail. I predrilled holes with a countersink bit.
If you don’t have a Kreg Jig, no problem. Just used 3 — #8, 1.5″ wood screws and screw those in from the outside boards into the bottom board. Use wood glue for extra reinforcement.
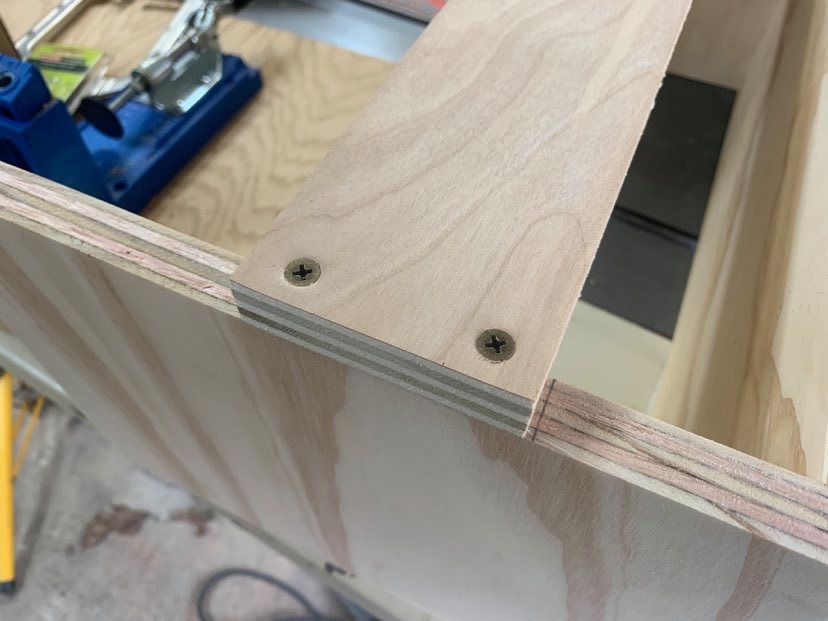
The above photo, shows a close up of the rails. These serve to complete the box and keep the blocks from falling out. I positioned my board and drilled two holes for the wood screws. I used a countersink bit so the screw heads would rest flush with the wood.
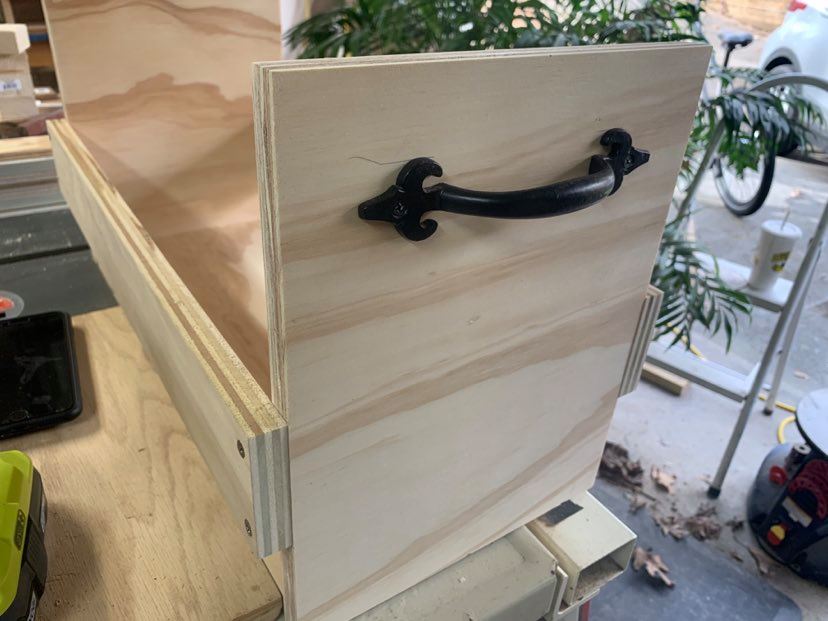
I had these black handles on hand and attached them to the side boards for lifting and carrying the box. I got these from my local craft store. You’ll need smaller wood screws for the handle, preferably a black color.
There are many different ways you can add a handle. You could also just cut out a big notch in the sides as a handhold.
Step 3 – Paint the Carrying Case
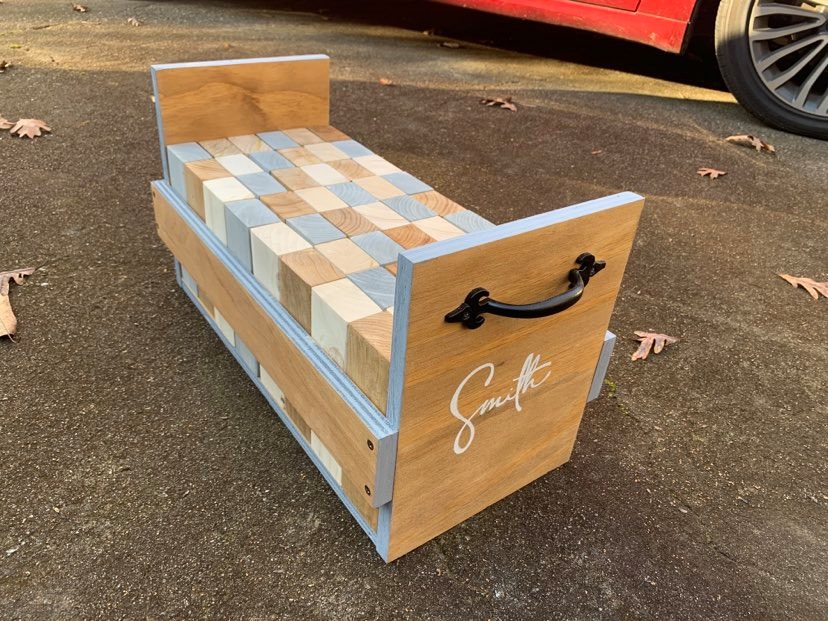
Last step is to paint and stain the carrying case. As you can see in the photo above, we used the Danish Oil to stain all the outside surfaces of the carrying case and the blue paint on the edges. My daughter hand painted the name of her fiance on one end. The bottle opener is on the opposite end.
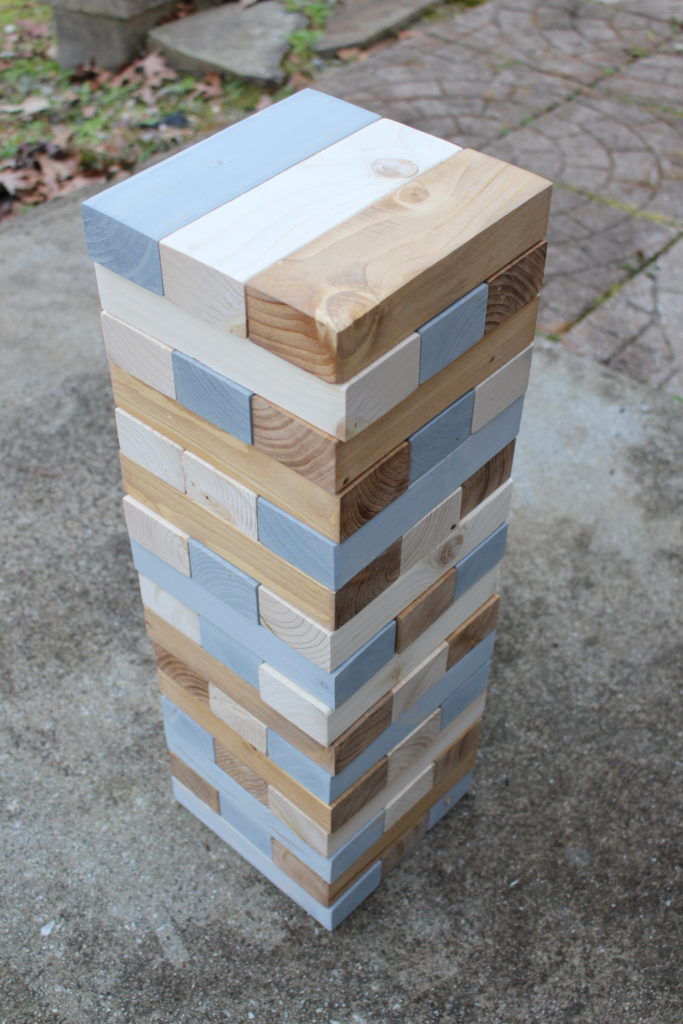
If you enjoyed this giant Jenga-like yard game tutorial, please consider subscribing. The signup form should either be below this post or in the sidebar.

Are you starting up a new shop? Want to work safer in your shop? To help you answer these questions I've put together a 2-part checklist -- Home Shop Safety & Tool Checklist.
I will also send you updates of my latest woodworking and DIY projects. You can get all this by subscribing to my free email newsletter.
