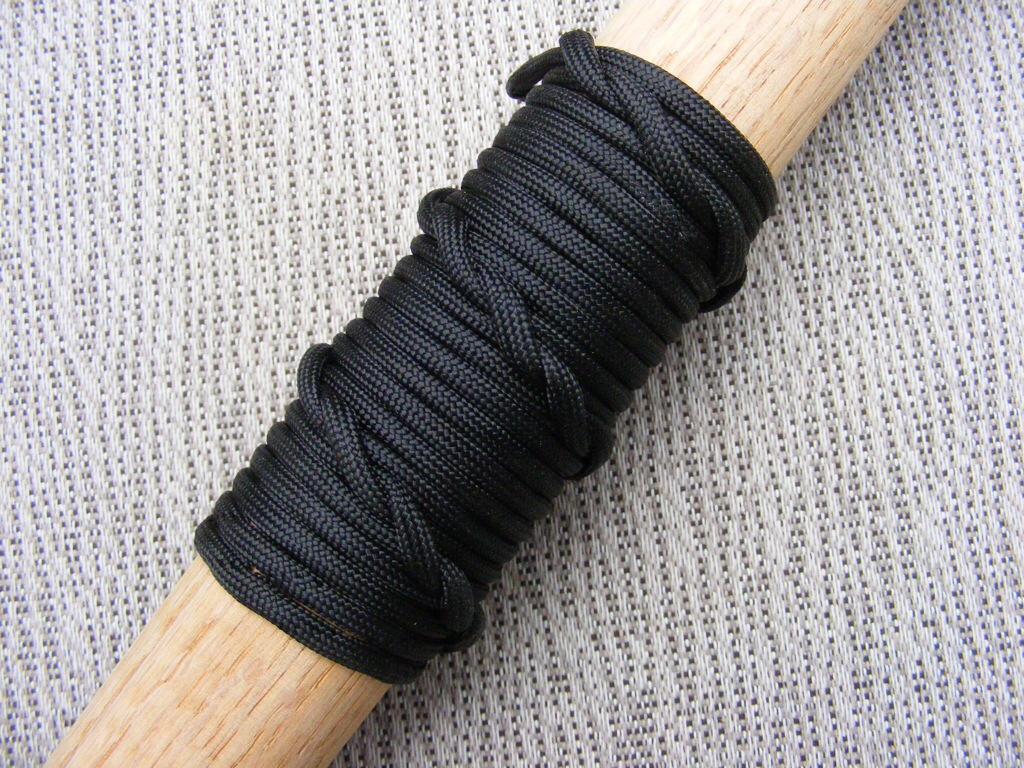
Okay, my kids love to tease me about making bracelets. They’re paracord bracelets, I try to tell them. My man jewelry or, as I often say, one of my man crafts. Anyway, there are several other things you can make with paracord, like a hiking stick paracord wrap. It looks nice, and it helps you better grip your hiking stick.
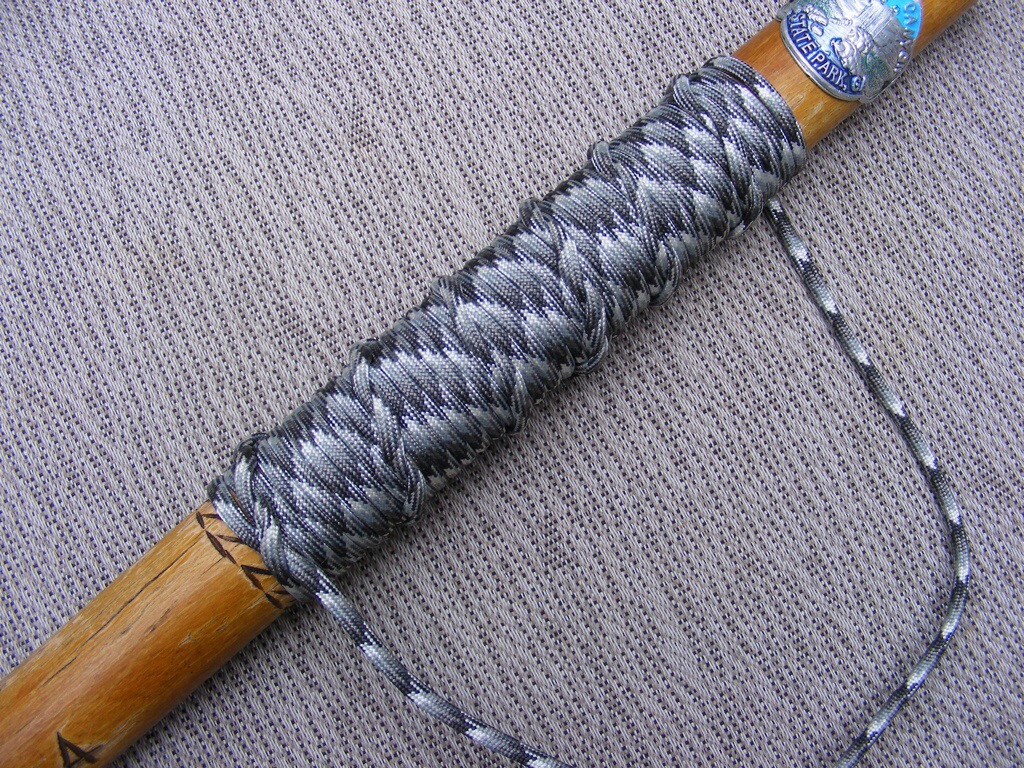
Maybe your kids will be more impressed than mine, but I found this to be a fun project. I used the spiral hitch to make the wrap, and it looks very decorative. You can use the spiral hitch handle wrap for many things. Tie it on your hatchet handle, a flashlight, yard rake, fishing rod handle, literally anything that’s round.
What you will need:
550lb Type III Paracord
Lighter (adult supervision required)
Sharp scizzors
Hiking stick, flashlight, or whatever
You may be asking: how much Paracord? It depends on the circumference of your hiking stick and how long you want the wrap to be. The hiking stick in this tutorial has a circumference of 4 inches. So I figured I needed 36 inches of paracord for every 1 inch of wrap. Your hiking stick might vary from mine. Just experiment.
Other helpful resources:
Grab a copy of the book — Paracord Outdoor Gear Projects. Amazon has over 200 positive reviews on this book and full of fascinating paracord projects. It takes you step-by-step through the process of making bracelets, lanyards, pouches, straps, slings, etc. View on Amazon
And if you’re new to hiking, check out my short PDF on Day Hiking 101. It’s a simple guide for those are just getting into hiking.
And now — on to the tutorial:
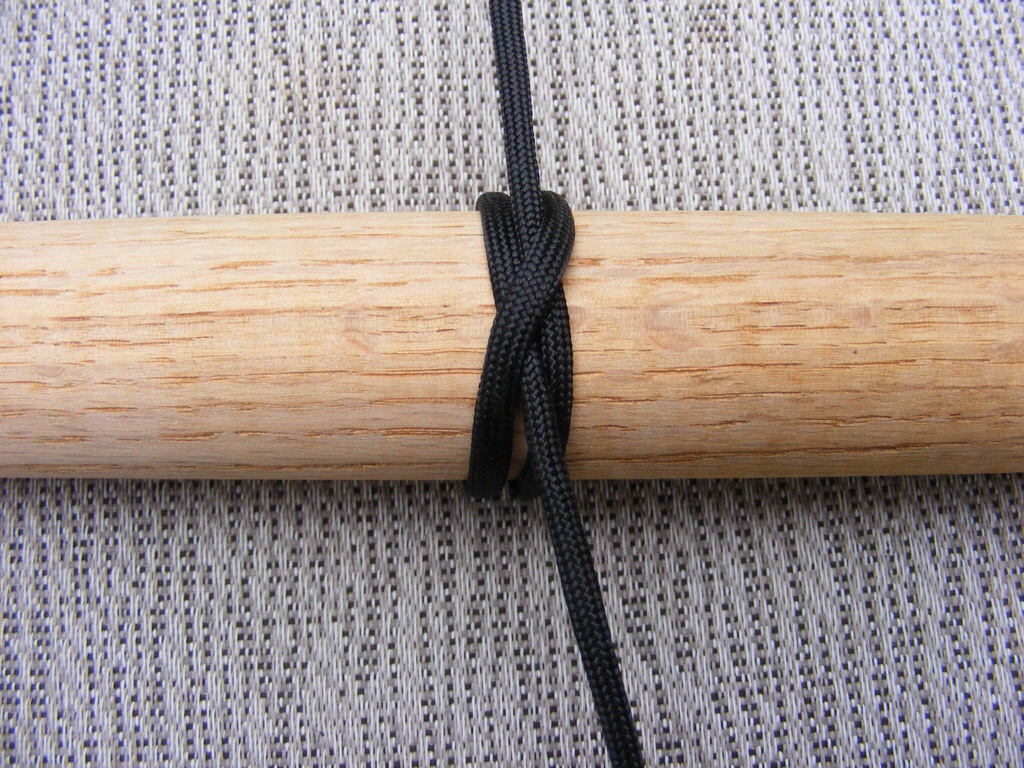
In steps 1 to 4 below, I start my hiking stick paracord wrap with a clove hitch knot. You could also start this with a simple overhand knot.
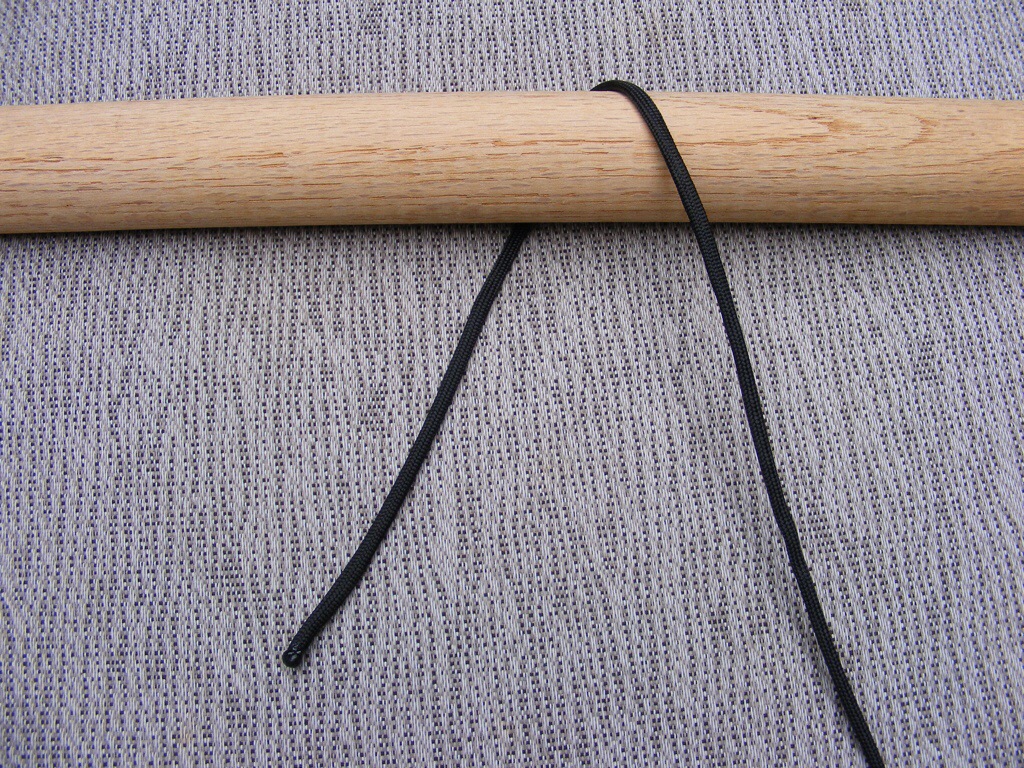
Step 1 – Start the clove hitch knot
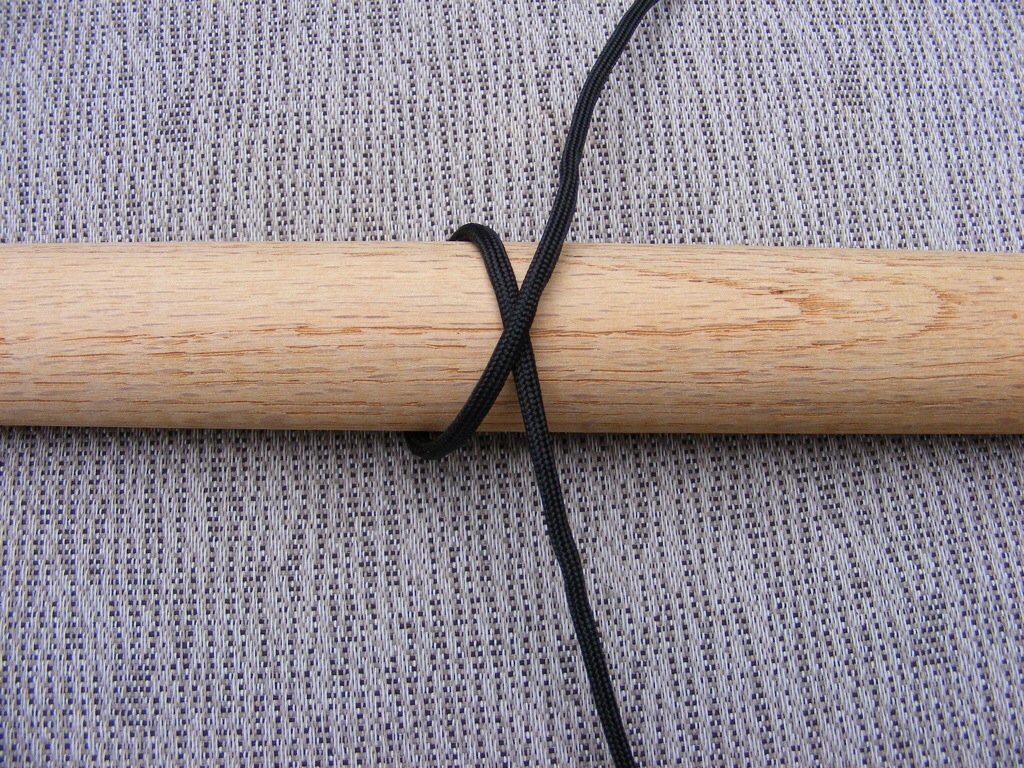
Step 2
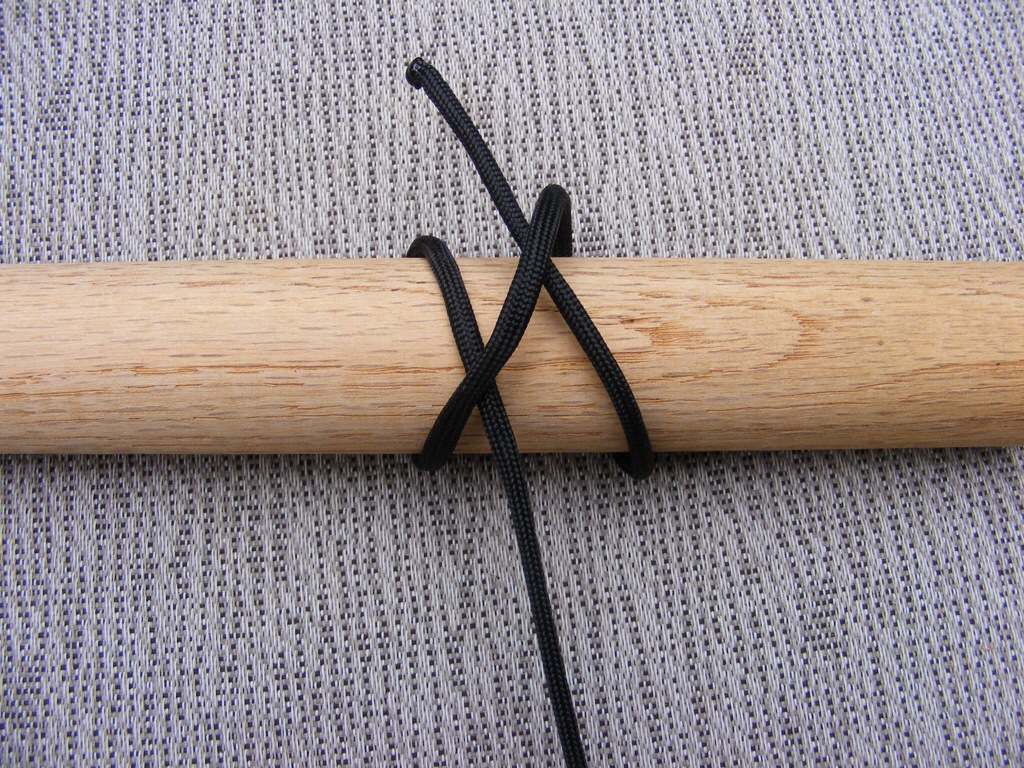
Step 3
Step 4 – Complete the clove hitch and cinch tight around the hiking stick.
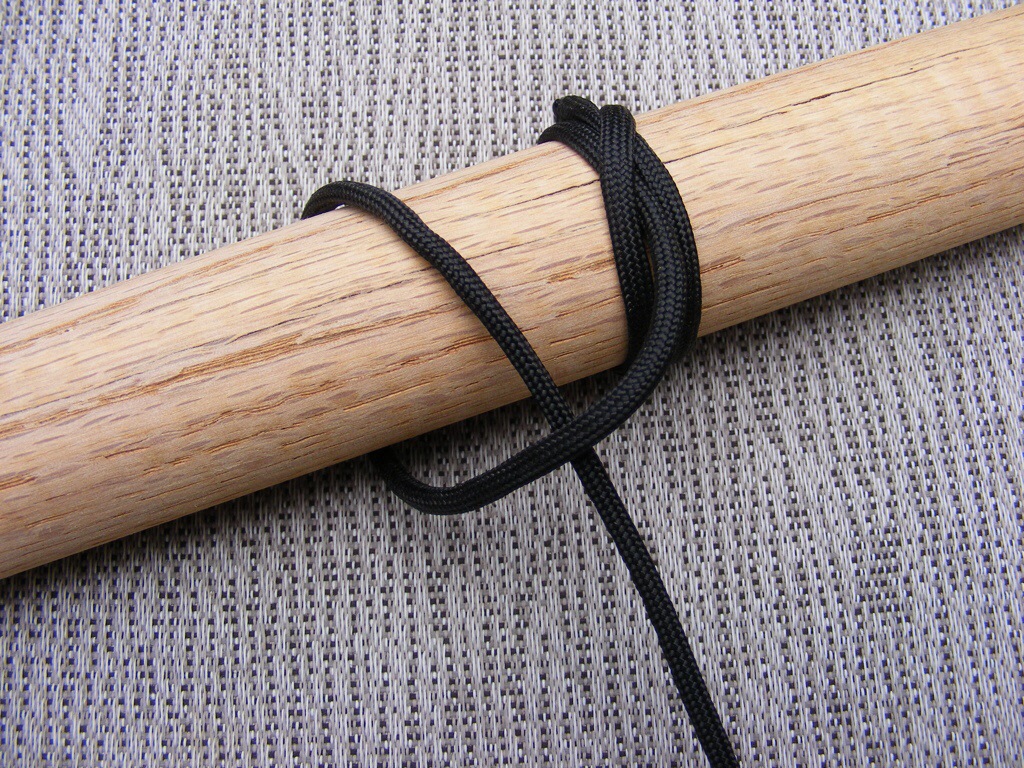
Step 5 – Wrap the paracord around the back of the stick as pictured and pull it through the loop you just created.
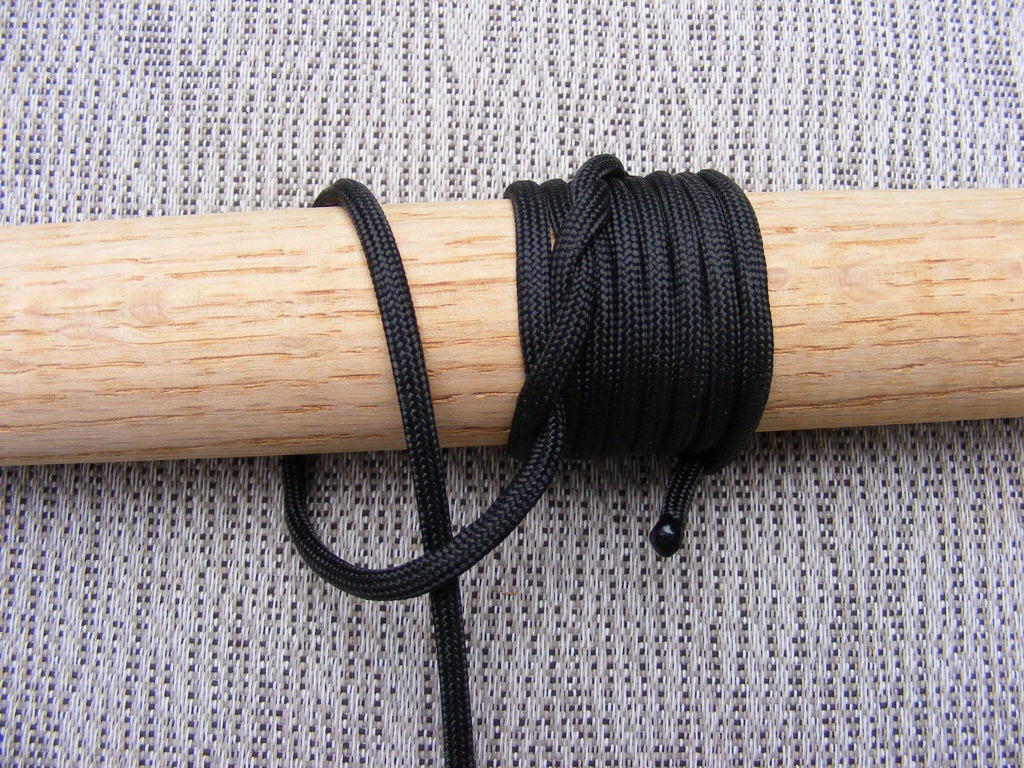
Step 6 – Continue Step 5 over and over until you’ve reached the desired length of your hiking stick wrap.
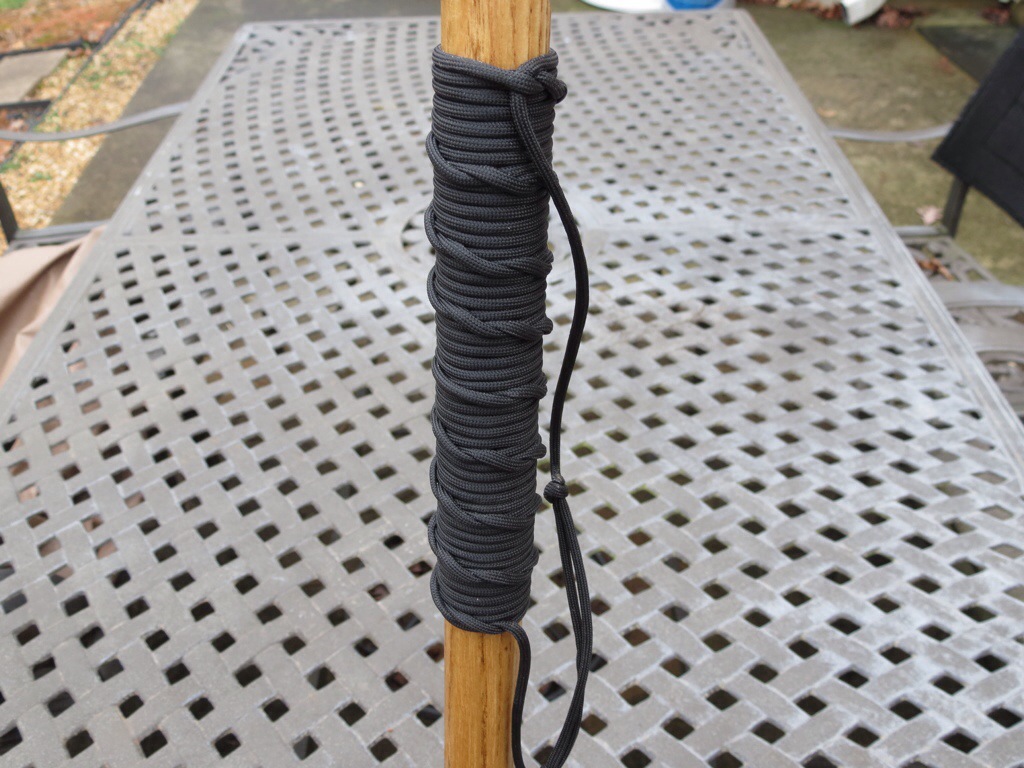
Step 7 You can finish the wrap a couple of ways. The way I did it (the first picture below) was to trim the paracord ends with some sharp scizzors and singe the ends. In the next to last picture, I show you an alternate way. Leave about 6 to 7 inches of excess paracord on both ends of the wrap and then just tie those together. This creates a loop that can go around your wrist. Incidently, the loop comes in handy when you are doing some climbing and have to turn loose of the hiking stick.
Pictured below is a wrap I did for another hiking stick. Here, I used a Desert Storm Camo color.
Learn about more projects in a great book called Paracord Outdoor Gear Projects. Learn more about this book on Amazon. Click on the photo below to learn more:

If you want to decorate your hiking stick even more, be sure to check out my YouTube Videos below to learn how I carve and attach hiking stick toppers to my hiking sticks. These make wonderful additions to your hiking stick and can be great gifts for the hikers in your life.
Thanks for stopping by and taking a look at this tutorial. I hope it helps you. Please share your thoughts in the comment field below. And, feel free to share this tutorial with your kids, your friends, your scout troop, or whoever.

Are you starting up a new shop? Want to work safer in your shop? To help you answer these questions I've put together a 2-part checklist -- Home Shop Safety & Tool Checklist.
I will also send you updates of my latest woodworking and DIY projects. You can get all this by subscribing to my free email newsletter.



worked beautifully! Thanks for the tutorial.
I’m glad the tutorial was helpful!
was clueless on how to do this til I saw this site. easy simple instructions and remarkable results. thanks
I’m glad this tutorial helped you! Thanks for the comments.