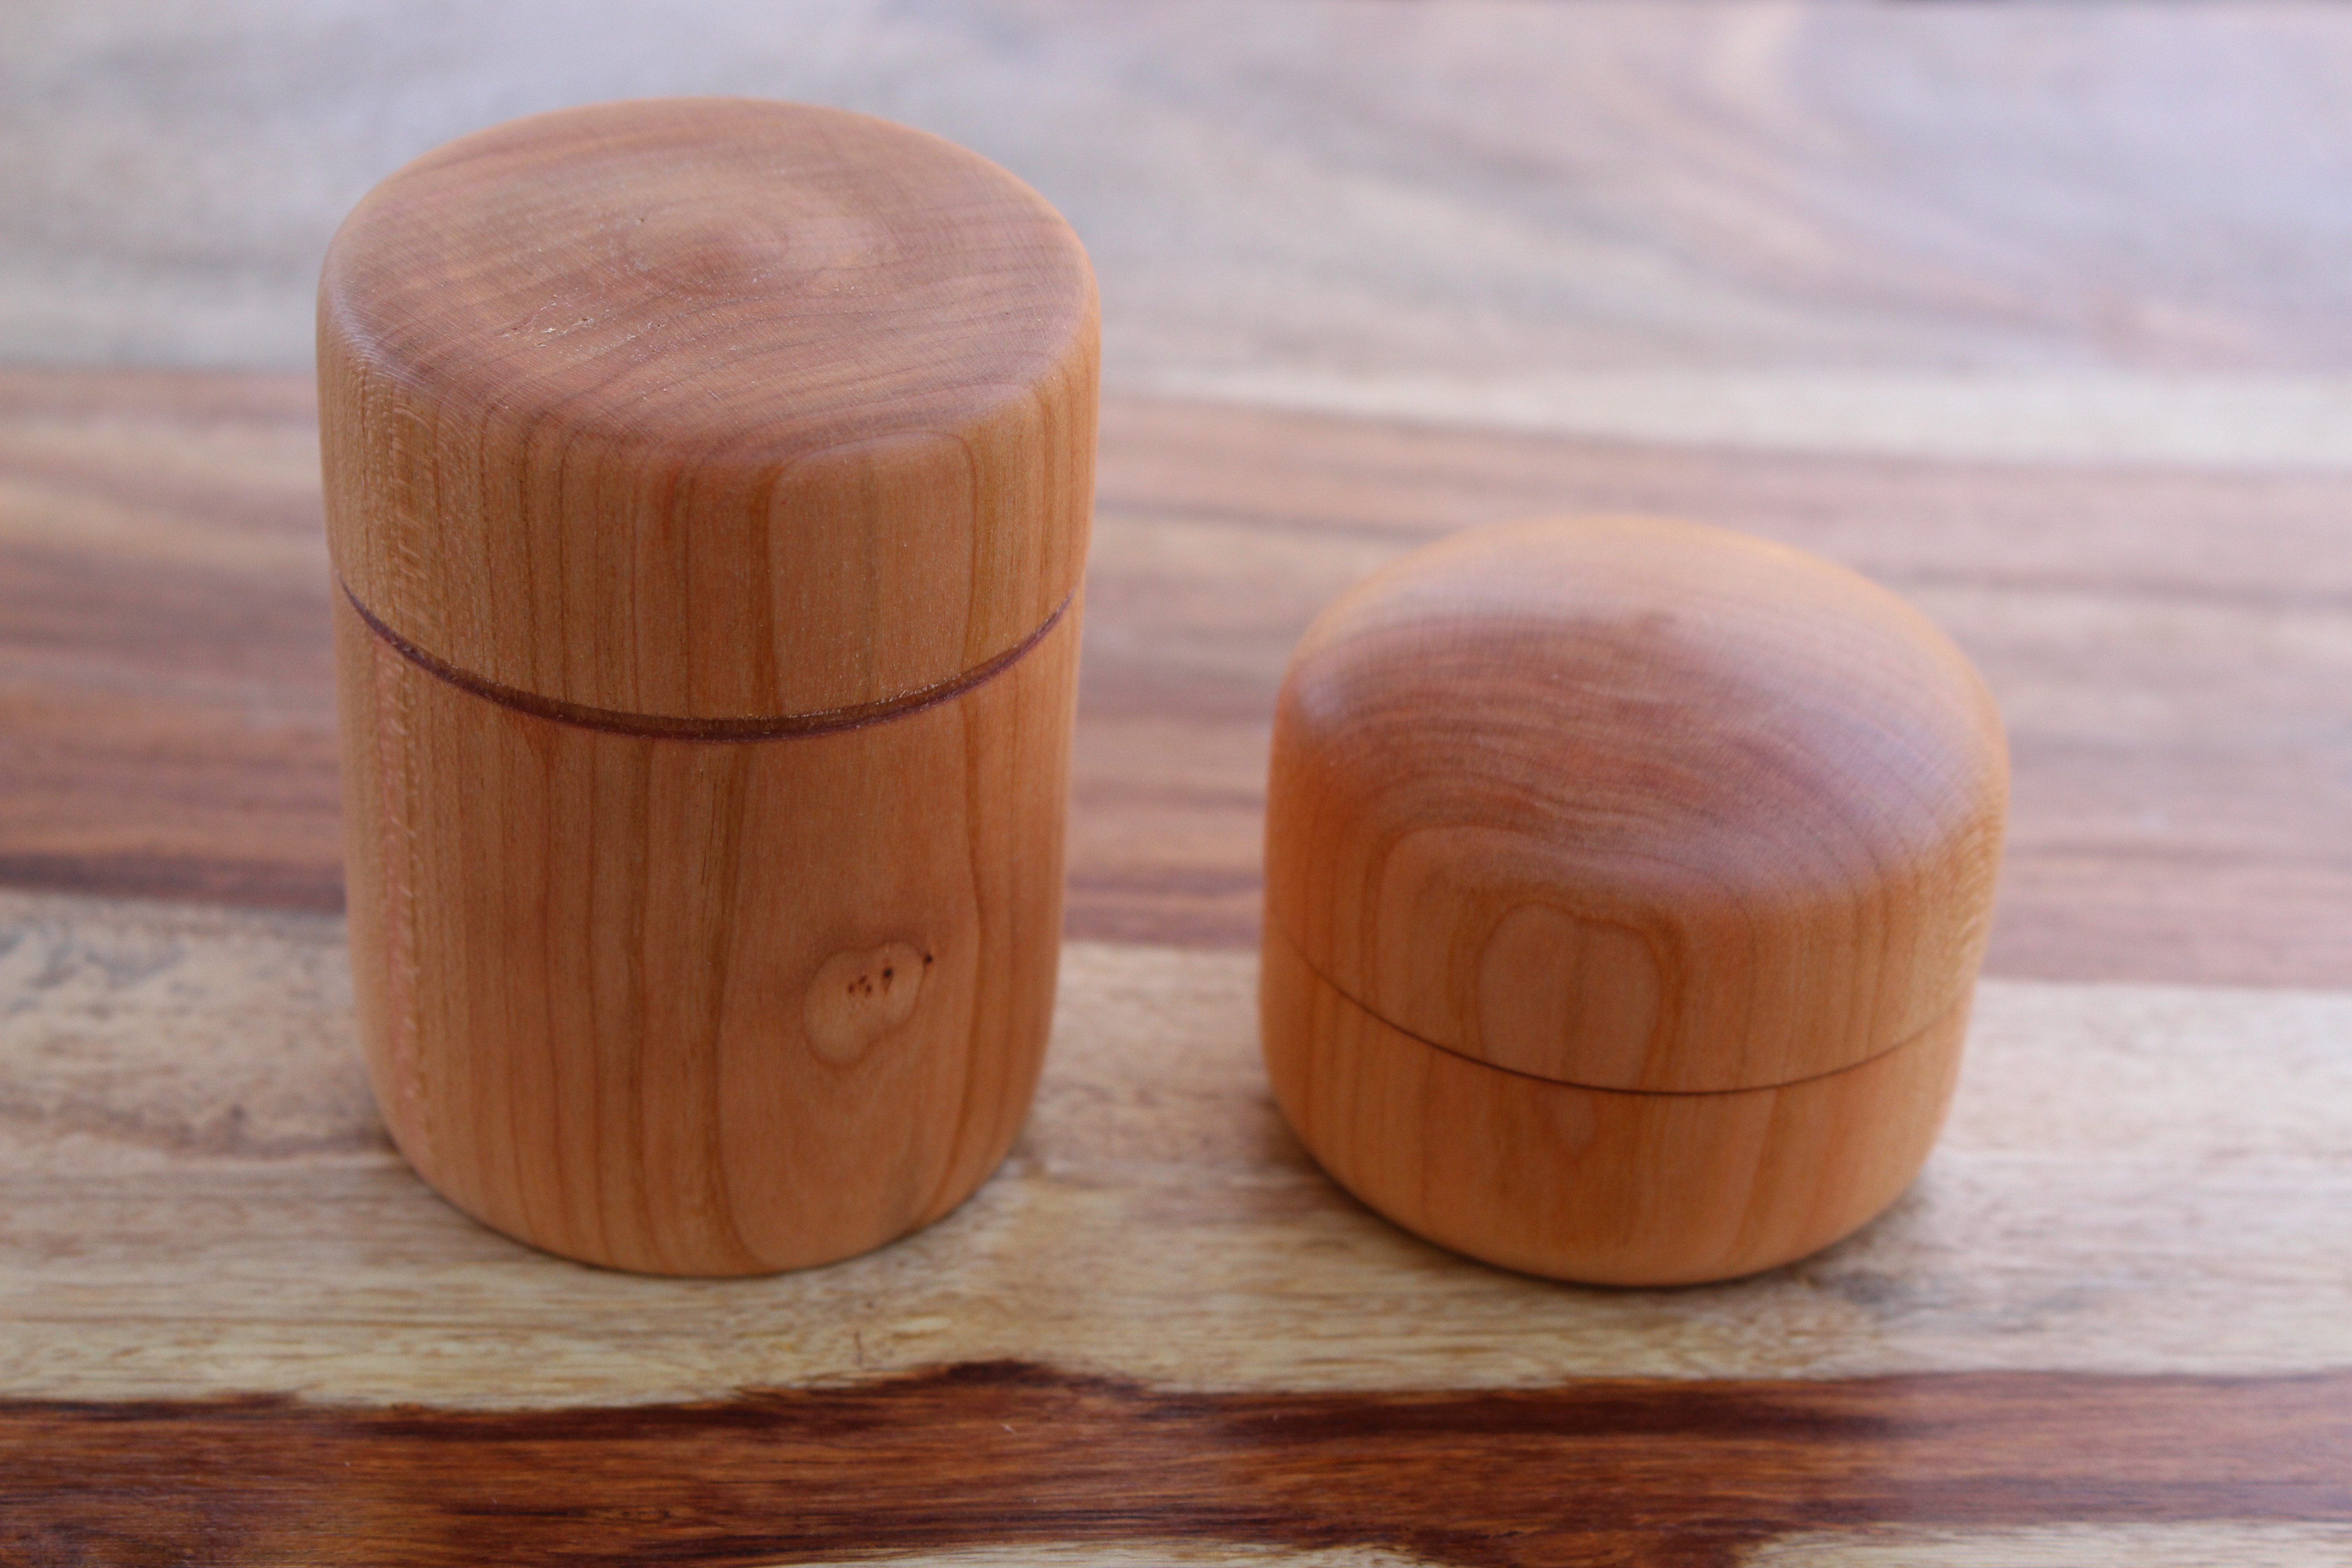
I just uploaded my 2nd YouTube video that shows how to make a lidded box on the lathe. Lidded boxes are a classic woodturning project. They’re fun to make and they can improve your woodturning skills. Check out the video — Turning a Lidded Box — and please consider subscribing to my YouTube Channel. Thanks!
What can I use this box for?
I love for most of my crafts to have a functional side. This particular box has a very small interior. It’s often referred to as a “capsule box.” But I can see where they would make for a nice decorative ring box. This would make an excellent gift for the females in your family. A ring box or a place to store earrings or other jewelry.
Wood Selection
I used cherry for this project, but maple and walnut seem to also be popular choices. I’m anxious to see how the cherry will perform long term. I’ve made bowls with cherry before and they tended to warp slightly after turning. If that happens it could potentially affect the fit of the lid. So far, it seems to be working find and maintaining the shape.
Lessons Learned and Tips:
I used several turning tools for this project: roughing gouge, spindle gouge, skew, parting tool, and scraper.
For hollowing, I tried using my 3/8 bowl gouge, but it was just too much for this small project. The small spindle gouge worked fine for this size workpiece.
For safety, I wore my face shield and dust mask
. I would have normally had the dust collector on, but didn’t want that background noise in the video. Anytime you are working with pieces that are in a jamb-chuck setup, there’s a possibility of it coming off the lathe. So a face shield is a must. But for most of the turning, the wood was secure in the scroll chuck.
Keep your tools sharp. I have a grinding wheel and a Wolverine Sharpening Jig setup (affiliate link).
The techniques are very similar to turning a bowl. You’ll do some turning on end grain, especially when hollowing out the box. So you may need to practice these techniques on scrap wood, if you’ve never turned end grain before or if you’ve never made a bowl before. It’s also helpful to practice your bead turning techniques for shaping the exterior of the box.
I’m still learning how to master the skew. Unfortunately, on my first box attempt I accidentally let the point of the skew hit the turning wood. And just a small catch blew out a big chunk of wood. But I was able to use that piece later for my jam chuck.
Also, for my first attempt, I parted the lid off the lathe, forgetting that I needed to sand and finish the inside of the lid. So pay attention to each step as you move along.
The critical factor for this project was getting the lid to fit snuggly on the box and squarely. It’s a friction fit and you want to be able to turn the box upside down without the lid coming off. It takes some trial and error, but take your time and you’ll get there. Just remember to NOT sand that lid “spigot” or “tenon” or you’ll loose that snug fit. If you somehow lose the snug fit, it’s not the end of the world. You’re still left with an awesome looking box that’s usable.
For sanding, I used 120 grit, then 220 grit, then 320 grit and then 500 grit. Buff with a cloth or paper towel. I used butcher’s block conditioner on my sandpaper to help lubricate it while sanding. It’s a mixture of oil and wax. I also let this be my finish, but could have gone other directions with the final finish. For my next box, I’ll probably try the friction polish I use on my pens — Pens Plus (affiliate link).
Ideally, you want the inside of the box to have the same appearance / finish as the outside.
If you have any questions about this project, you can either email me or leave a comment.
Good luck and happy turning!
Stephen

Are you starting up a new shop? Want to work safer in your shop? To help you answer these questions I've put together a 2-part checklist -- Home Shop Safety & Tool Checklist.
I will also send you updates of my latest woodworking and DIY projects. You can get all this by subscribing to my free email newsletter.


