So you finally decided to buy your first wood lathe. That’s excellent, because you will be able to make a variety of cool projects–pens, bowls, bottle stoppers, salt and pepper mills, game calls, fishing lures, and the list goes on. This post gives some practical advice on choosing a wood lathe and matching it toward what you want to make.
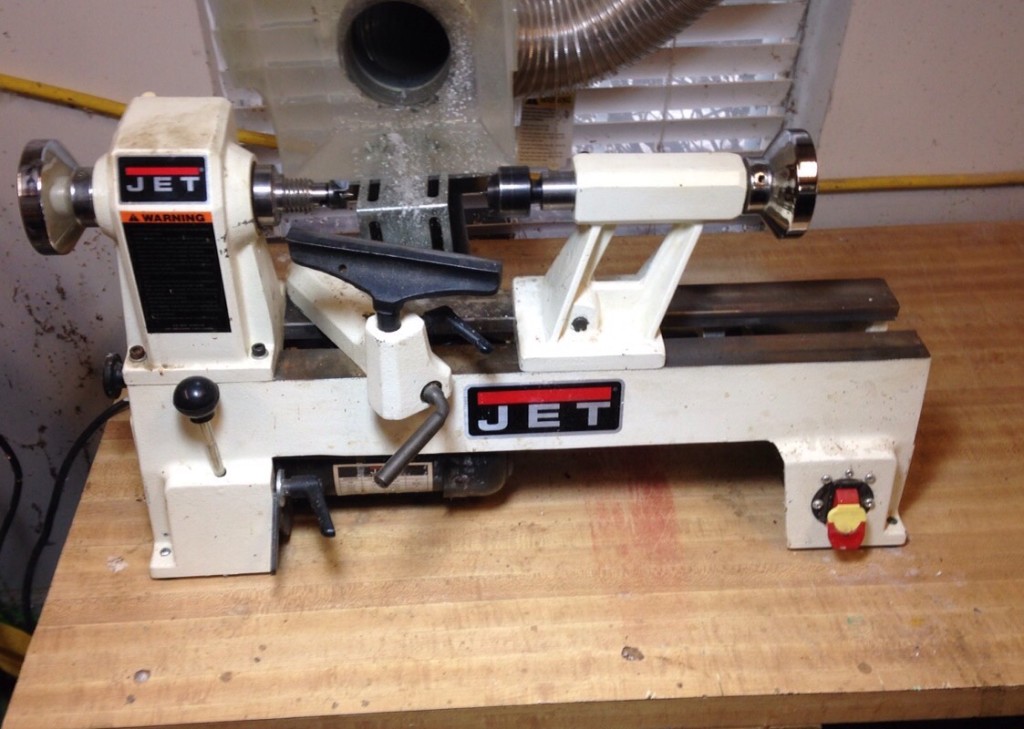
I’ve owned a Jet Mini-lathe (specifically the JML-1014) for over ten years now. I mainly use it to turn pens which I occasionally sell but mostly give away. I’ve sold enough pens to more than pay for the lathe. Jet makes a high-quality lathe, and it’s provided many hours of fun and relaxation. I’ve also created small bowls, wine bottle stoppers, wooden spoons, spinning tops, handles, pepper mills, key chains, and Christmas tree ornaments.
It’s a great way to make unique gifts for family, friends, co-workers and employees. It seems like people really appreciate gifts that you put time and talent in to make for them.
So where do I start?
For someone just starting out, I would suggest that you do some research. Surf the web, purchase books or magazines, and begin by asking yourself three important questions:
- What size projects do I plan to turn on my new lathe?
- How much space do I have for a new lathe?
- How much can I spend?
Answering these three questions will help you narrow down your choices. Lathes come in small, medium, and large sizes. If you just plan to make pens, game calls, pepper mills—small projects—then a mini-lathe works fine. You can even make small bowls.
What about mini-lathes?
If you’re like me and your “shop” is the other half of your carport, a mini-lathe works perfectly. My Jet sits on a wooden bench and occupies a space of 1 ft. by 3 ft. You can also buy bed extensions for these if you want to turn longer projects.
Mini-lathes are also very portable. So if you anticipate doing craft-fairs, mini-lathes are easy to carry along to give demonstrations. Also, think about other possible demos you might get asked to do: Boy Scouts, woodworking clubs, civic clubs, etc.
The mini-lathe’s only downside is you’re limited to making smaller items. However, that may not be a problem if small projects are what you want to turn.
What about full-size wood lathes?
If you have enough shop space and believe you might turn bigger projects someday, then consider investing in a medium-size or full-size lathe. With the bigger lathes you should be able to turn it all — big and small-size projects. The full-size lathe typically comes with its own stand, so you’ll need to find a designated spot for it in your shop.
Where can I buy a wood lathe?
Typically, you’re going to find these in a specialty woodworking store like Woodcraft or Rockler. And that’s good, because the sales folks in those stores usually know a lot about woodworking. But just be careful they don’t talk you into buying more than you need.
You don’t typically find these on display in the home improvement stores like Home Depot or Lowe’s. However, you can purchase them online from these stores. So, maybe you could go into the specialty store to see the display models, but then purchase online from another store. That might save you some money if the price is right.
Lowes and Home Depot also sell several lathe accessories online, so shop around.
How much do wood lathes cost?
Lathes begin around a few hundred dollars and move up in price to several thousand dollars. (I paid $500 for my new Jet, but the price has gone up over the years) If you think woodturning will become a long-term hobby, and if you think you might make crafts to sell, then consider investing more money into your lathe. You probably don’t need the high-end lathe just starting out, but don’t settle for a crappy cheap lathe either.
More tips for choosing a lathe
- Read reviews on lathes and only invest in a reputable manufacturer. Ask if the lathe comes with a warranty and what does the warranty cover.
- Check to see if you have a local turning or woodworking club. I’m sure someone would be willing to give you advice and show you their tools and setup.
- Sign up and attend a woodturning class. Check to see if your closest woodworking store offers classes. This will give you a good idea of how a lathe works and what features to look for.
- Some lathes come with variable speed motor controls and some are belt-driven which means you have to turn the lathe off and adjust the belt to change speeds. You will probably spend a little more for the variable speed control, and it’s a convenience factor. But it comes in very handy if you turn a lot or you’re short on time. If you’re looking at selling your turnings, I’d recommend getting the variable speed control.
- Visit storerooms and test the lathe before you purchase. Ask them to turn it on so you can inspect for vibration and alignment. Place a drive spur in the headstock and a live center in the tailstock. Bring the points together, and turn the lathe on. If they don’t line up precisely, don’t purchase that lathe. Ask to see another one or try another dealer.

- Don’t have a bench on which you can attach your lathe? No problem. For a little more money you can buy a stand. Just make sure it’s good quality and will dampen vibration well.
What accessories will I need to buy for my lathe?
Besides your lathe, you will need to consider a few accessories. That would include turning tools, face shield or safety glasses, dust masks, a sharpening system. I’d say these accessories are going to be needed for just about any project you turn on the lathe.
I wear both a face shield and safety glasses at the same time. I don’t want to just protect my eyes; I want to protect my whole face. Be sure to buy true safety glasses that have the ANSI approval stamped on it.
Starting out, you want to make sure to wear a dust mask to protect your lungs. To keep your shop cleaner, you’ll eventually want to invest in a dust collection system. Based on my experience, I would recommend you get a minimum of a 2 horsepower dust collector. But I’ll try to cover this topic in another post.
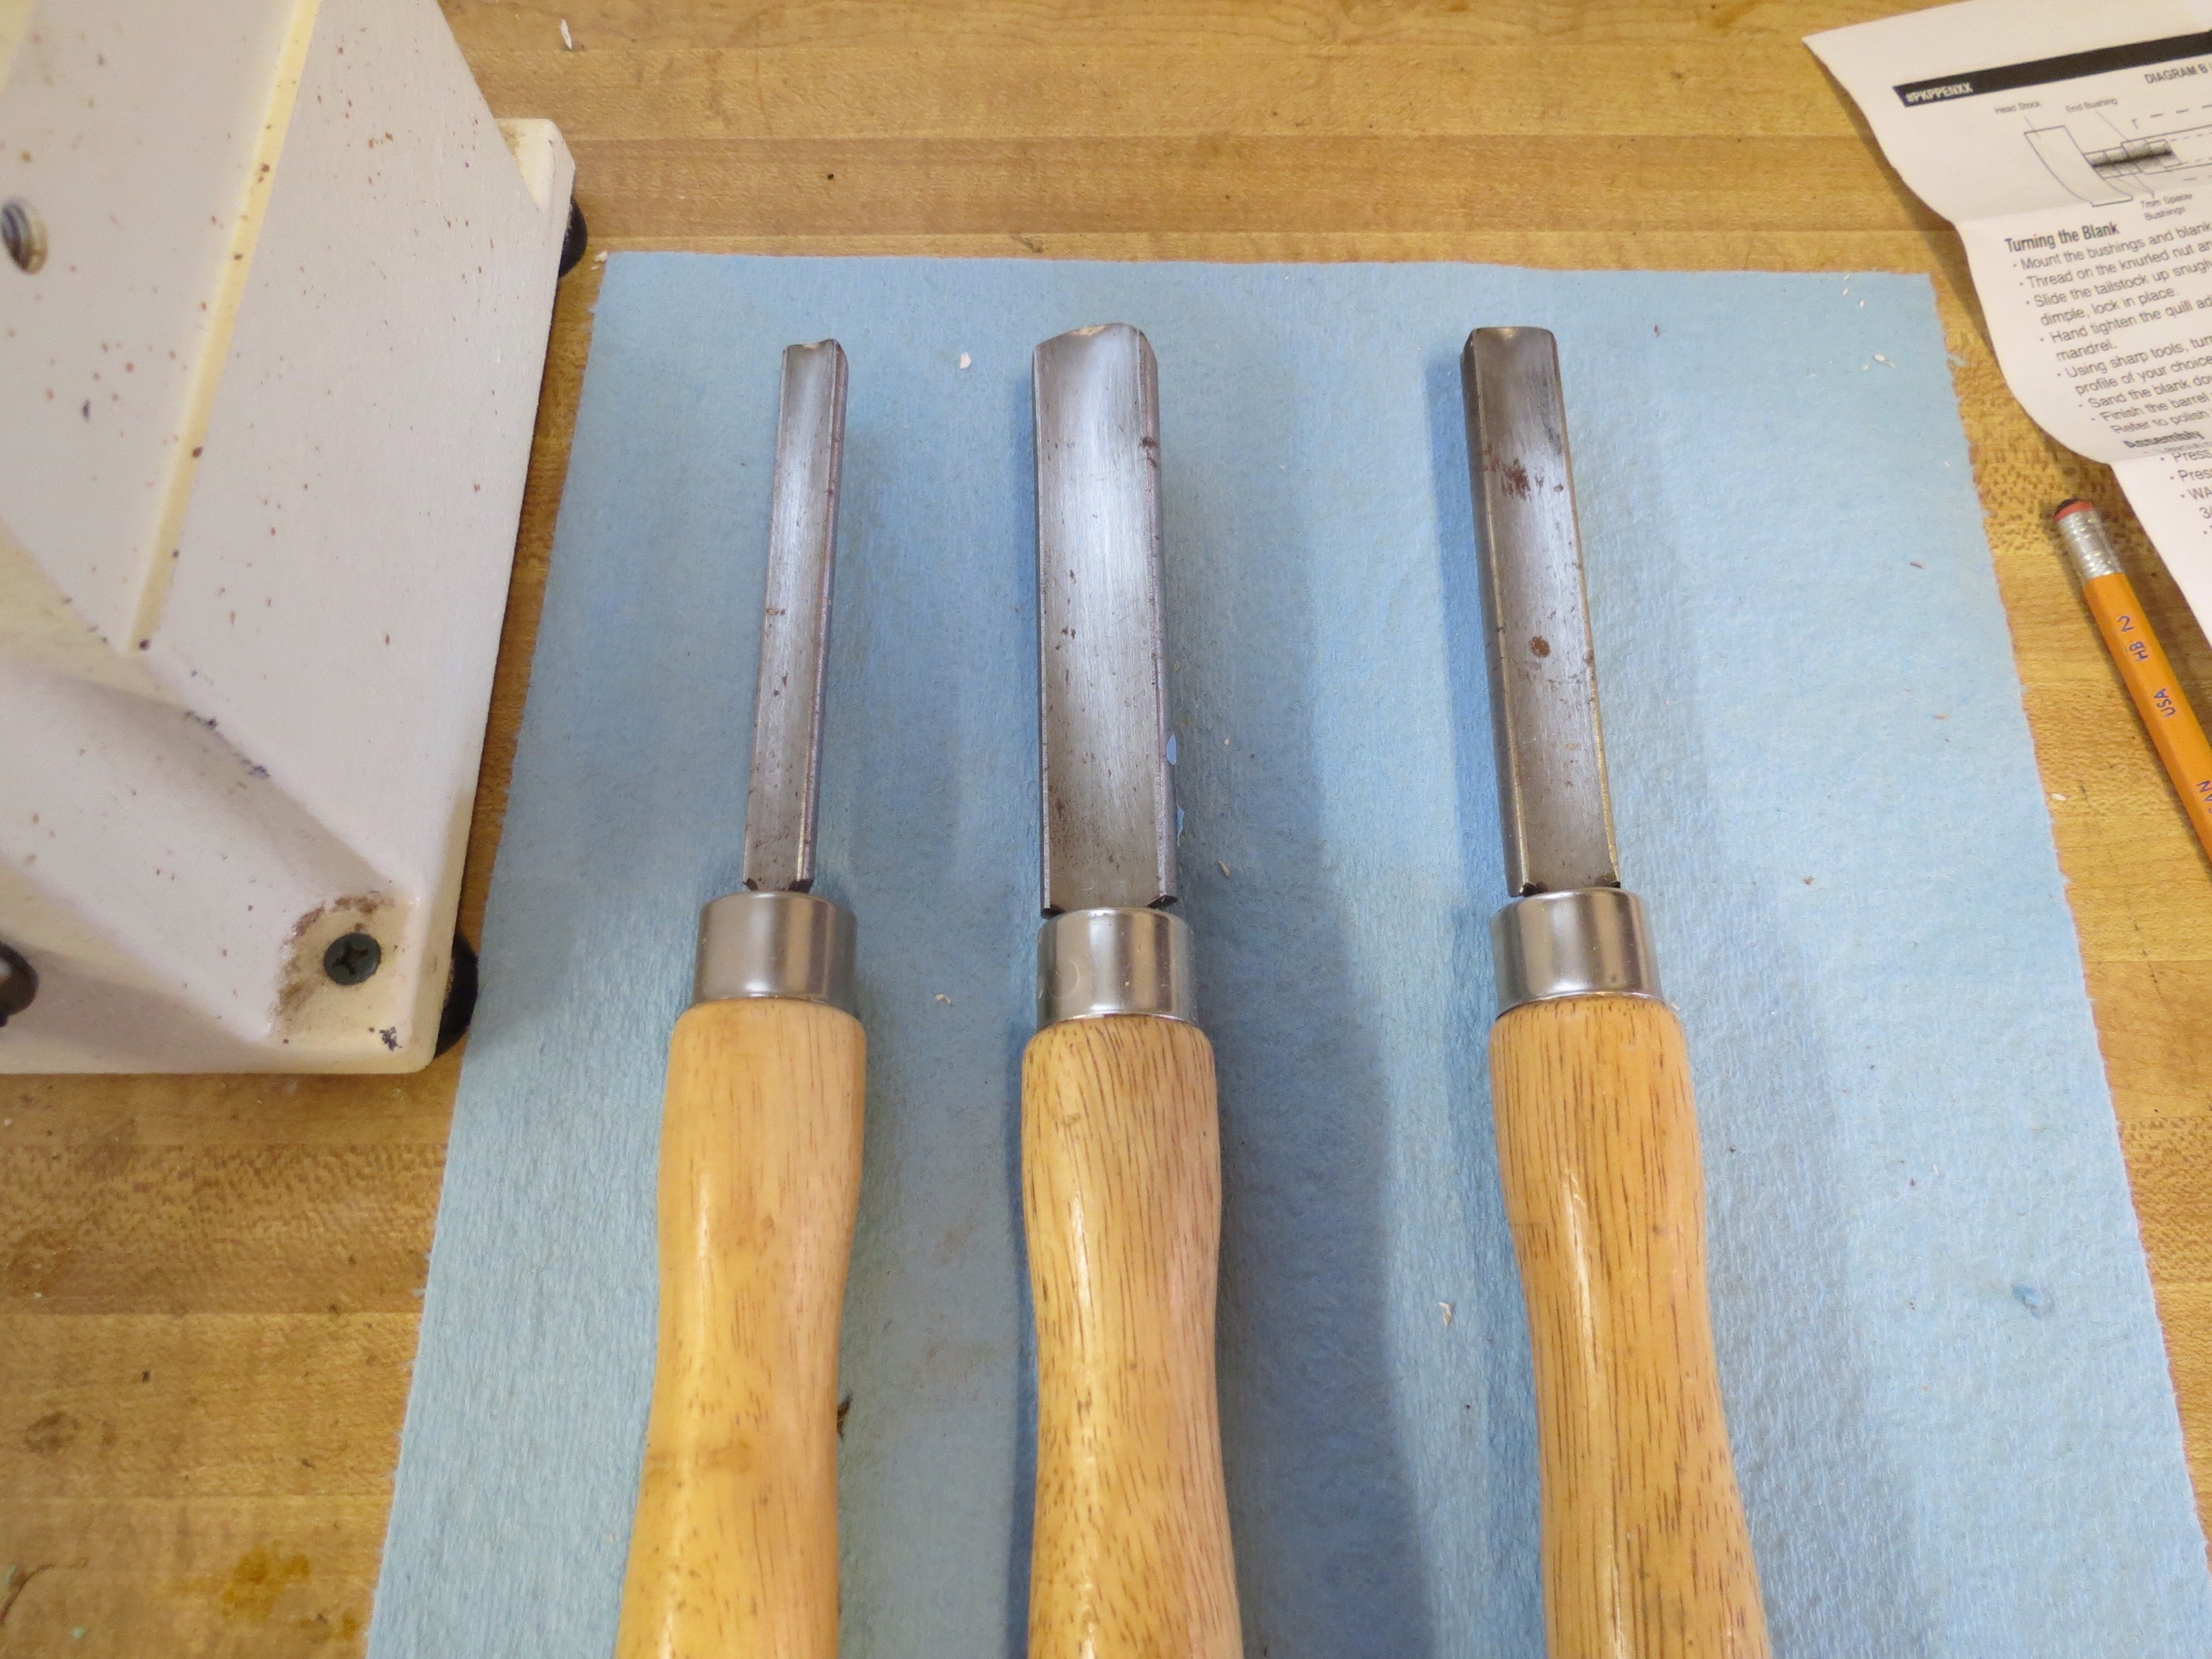
A sharpening system is also an important accessory you’ll need continuously. Your tools are going to get dull with use. You could invest in some sharpening stones, but I’ve found it much more convenient to use my bench grinder.
I bought a sharpening jig that I attached to the grinder. The jig helps me maintain the correct bevel angle on my turning chisels.

Buy other accessories depending on the project
So I previously mentioned accessories you’ll need for most any projects. Next come accessories you’ll want to get that depend on the project you are turning. Some of these can get a little pricey so shop around.
Another thing to remember about accessories is what if I want to upgrade to a new lathe one day. Some items like chucks come with variable inserts so that you can use that chuck on several different lathes.
Below are a few accessories you might consider, depending on the project you take on:
- Jacobs chuck – good for holding and drilling
- Collet chuck – for holding small pieces or tenons
- 60 degree live center – for turning between centers
- 4 jaw chuck – works great for turning bowls
- Bottle stopper mandrel – for making wine bottle stoppers
- Pen mandrel — a must if you get into pen turning
Pen turning accessories
Let me say a few things about pen turning accessories because this is where I got my start with wood turning.
As a beginner, you’ll need to get a mandrel for pen turning. A mandrel has a round rod on which the pen bushings and blanks rest as you do your turning. Your headstock spindle has something called a morse taper hole. The pen mandrel will come with a #1 or #2 morse taper fitting that rests in the headstock spindle. The steel rod on the mandrel comes in a 7mm and 8mm size. For my pen turning, I use something called a Mandrel Saver. Some advanced pen turners will turn between centers and not use a mandrel.
Check out my article Getting Into Pen Turning if you’re a beginner. It’s a very comprehensive guide to pen turning. I also made a few videos.
A few more tips for setting up your new lathe
So you bought a lathe and you’re getting it out of the box to set up. Here a some tips for setup.
- I know, you don’t have time to read, but please take a minute and locate the lathe manual. Read through it for specific set-up instructions and safety tips.
- Make sure you’re not missing any tools or accessories that came with your lathe.
- They are somewhat heavy, so get a friend to help you lift the lathe out of the box and place on your bench or stand.
- Locate the lathe so it’s close to your dust collection system (if you have one). I use a hood that attaches to my dust collector pipe and it helps funnel the shavings into the dust collector. I have a Shop Fox dust collector. Mine is a 1 horsepower, but I highly recommend getting a minimum of 2 horsepower.
- The rule of thumb is to place the lathe at a height so your elbow is the same distance as the center of the drive. Don’t worry if it’s not exact. Just try to get it as close as you can. This should help keep your body in a more comfortable position while turning.
- Once you’ve decided on an exact spot — preferably on your sturdy wooden bench — screw or bolt the lathe to the surface. This will help minimize vibration.
- You’ll also need to consider lighting. I bought a cheap shop lamp that I can clamp to a shelf above my lathe, and it works fine. You will need good light above your work to check for scratches and final finishing. I’m using a 200 watt compact fluorescent bulb.
Caring for your Lathe
My lathe has not required much upkeep, but here are a few things I do to make sure things are in working order:
- Periodically check my drive belts for wear and tear. These can be changed out if needed.
- Vacuum the dust from your lathe and clean it to keep grit and grime from building up. My manual says to only use a damp cloth and mild solvent. Follow your owner’s manual on cleaning.
- Plug the 3-prong cord into a receptacle that receives it. That bottom prong is the equipment ground and that’s very important in case your lathe were to short out sometime.
- Lubricate as needed or as your owner’s manual requires. You can lightly spray some lubricant on the lathe bed so the tail stock glides easily back and forth.
- When applying finishes or a CA glue finish to your turning project, cover up the lathe bed and protect your motor. The motor on my Jet is located directly under the stock I’m turning. It’s not good for stuff to drip onto or get into your motor.
- Eventually lathe accessories like mandrels or parts that have bearings, may need to be replaced.
Safety Tips
Safety should be a continuous thing you practice. The biggest thing to remember with a lathe is protecting your eyes and not letting your fingers or anything get caught up in the spinning stock. Also, don’t forget to remove chuck keys or other lathe tools. And above all — read the safety requirements in your manual.
Check out my 15 Safety Tips for Wood Lathes article to learn more tips for using your lathe safely.
Get my free Home Shop Safety & Tool Checklist
I would love to give you a free Home Shop Safety & Tool Checklist. This comprehensive PDF checklist will help you get your shop started and enable you to work safely. I also cover several key safety tips that pertain to the wood lathe. Enter your first name and email in the form below and subscribe to my site. I will also send you free updates & project tutorials through email.
Happy woodworking!

Are you starting up a new shop? Want to work safer in your shop? To help you answer these questions I've put together a 2-part checklist -- Home Shop Safety & Tool Checklist.
I will also send you updates of my latest woodworking and DIY projects. You can get all this by subscribing to my free email newsletter.





2 thoughts on “Your Guide For Choosing A Wood Lathe”
Comments are closed.